Configure an AR scene
This article uses image tracking as an example to introduce how to configure the simplest AR scene.
Before you start
- Follow Enable EasyAR to import the EasyAR Sense Unity plugin and fill in the license (License Key).
Note
If your project uses URP (Universal Render Pipeline), you also need to configure URP.
Add AR Session
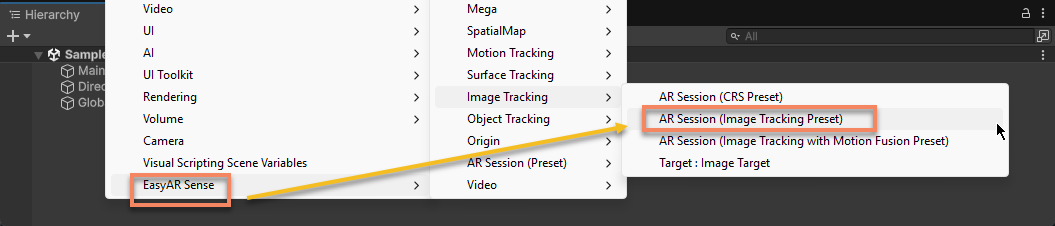
In the Hierarchy view, right-click in an empty area and create a session for image tracking through the menu EasyAR Sense > Image Tracking > AR Session (Image Tracking Preset).
Configure the camera
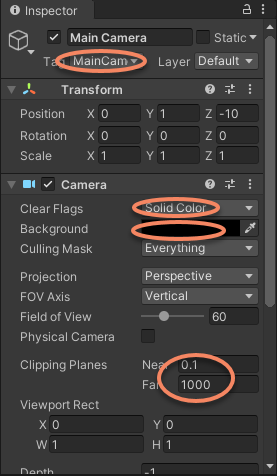
Select Main Camera, and set the following parameters in Inspector.
- Set
Clear FlagstoSolid Color. - Set
Backgroundto black. - Set
NearofClipping Planesto 0.1 (meters), andFarto 1000 (meters).
Add Target
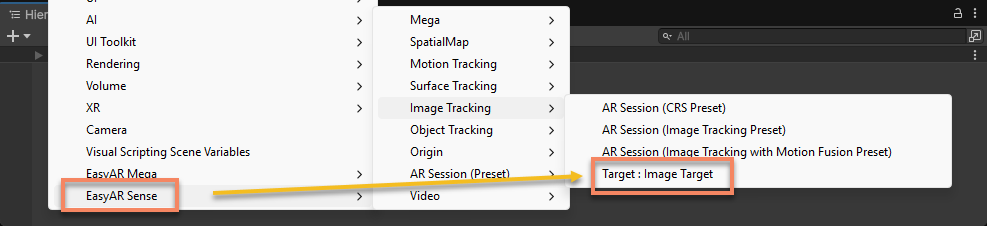
In the Hierarchy view, right-click in an empty area and add an Image Target through the menu EasyAR Sense > Image Tracking > Target : Image Target. It is displayed as a question mark icon by default.
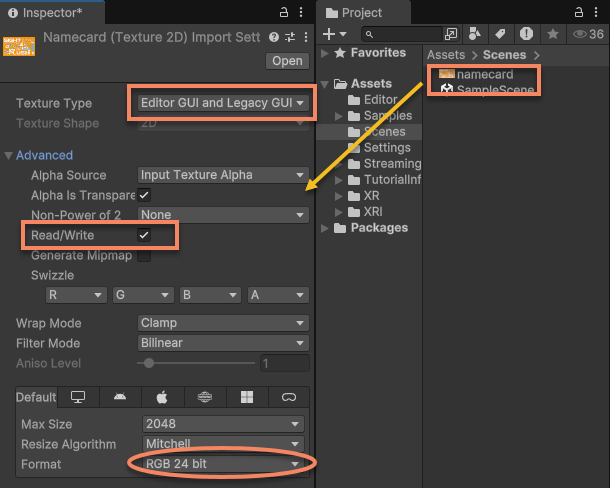
Select the image to track, set the following parameters, and click the Apply button to apply the settings:
- Set
Texture TypetoEditor GUI and Legacy GUI. - Enable
Read/Writein Advanced. - Set
FormattoRGB 24 bit.
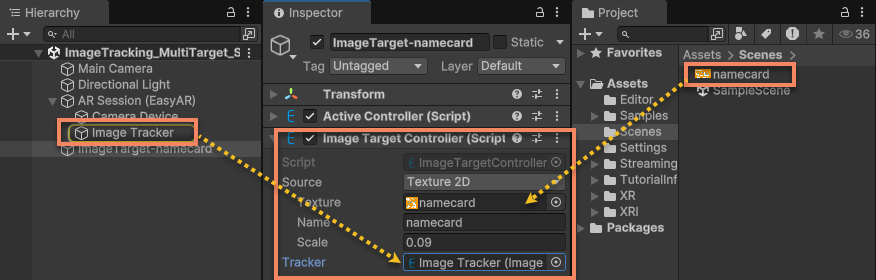
Configure ImageTargetController:
- Set Source Type to
Texture 2D. - Set Texture to the configured image.
- Set Name to namecard.
- Set Scale to 0.09 (meaning 0.09 meters).
- Set Tracker to
ImageTrackerFrameFilterunder ARSession.
Tip
Some configuration items differ when Source Type is different.
Add 3D content that follows Target
3D content added under the Image Target node keeps a fixed position relative to the image. That is, after the image moves, the virtual content follows it.
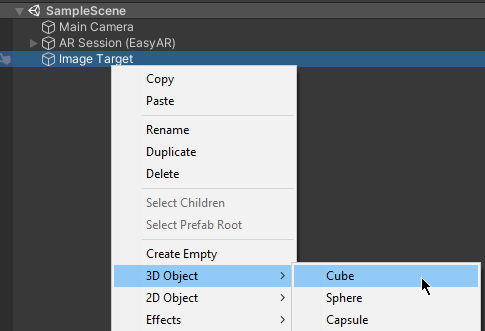
In the Hierarchy view, select Image Target, and add a Cube through the menu 3D Object > Cube.
Select the Cube you just added and configure its properties:
- Set Transform
Scaleto {0.5, 0.3, 0.3}. - Set the
zvalue of TransformPositionto -0.15 (to align the bottom surface of the Cube with the recognition image).
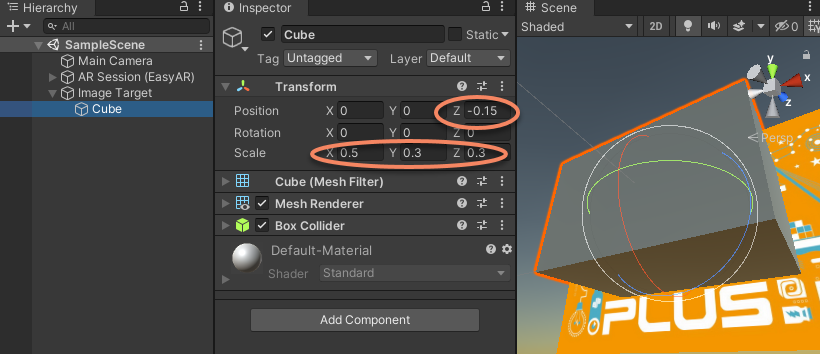
At this point, the simplest AR scene is configured. Run the scene and point at the image, and you can see the Cube appear above the image.
Next steps
- During running, you will notice yellow text displayed on the screen. You can read diagnostic information in the scene to understand what this information means and common configuration methods.
Related topics
- Learn about AR Session
- Learn about Camera in AR scenes
- Learn about Target