Enable the Mega Go editor tool
This article describes how to enable the Mega Go editor tool in the Unity editor, so that you can place 3D content aligned with the real scene in the editor.
Before you begin
- Check Can my localization feature be used? to confirm that the correct map has been downloaded.
- Add a Mega tracking target in the scene.
Note
The following content and tools apply only to the process of developing Unity applications with EasyAR Mega Go. Plugin version >= 4003.1 is required.
Mega Go does not support mini program development.
This article requires the following Unity packages to have been imported into the project:
com.easyar.sensecom.easyar.mega
Create the editor tool
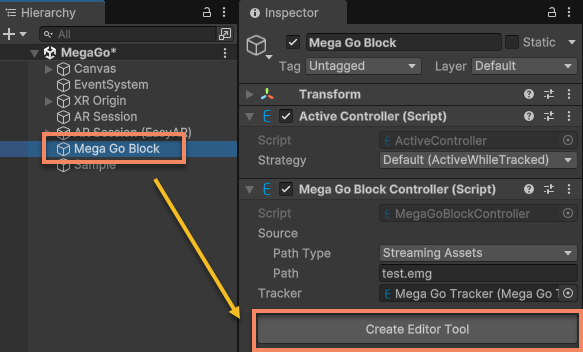
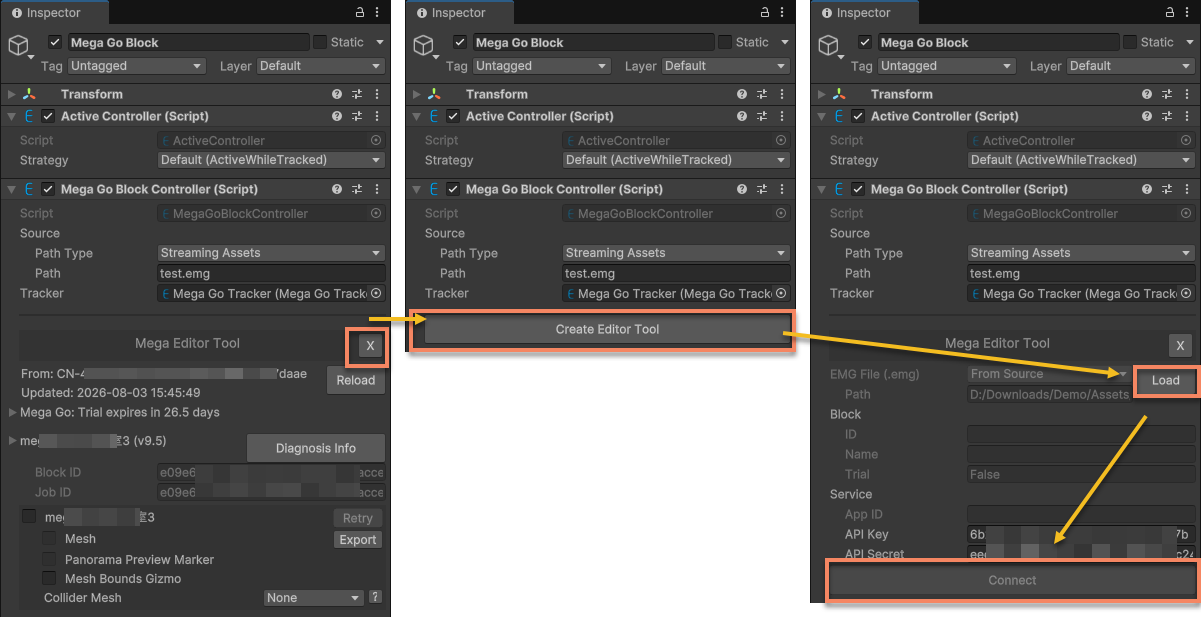
Select the tracking target in the editor and click the Create Editor Tool button.
Tip
If the application needs to create the tracking target in scripts instead of creating it in the editor, after placement is finished in the editor, you can record the tracking target and/or its child objects. At runtime, configure the tracking target through scripts and mount the child objects under the tracking target.
Load files
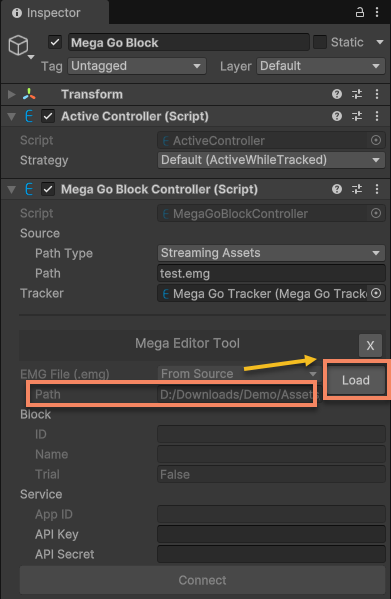
Depending on the PathType of the target Source, you can load an emg file from the StreamingAssets directory or from a custom directory. The file path that will currently be loaded is displayed in the editor tool.

Click the Load button. This loads the emg file according to the current configuration.
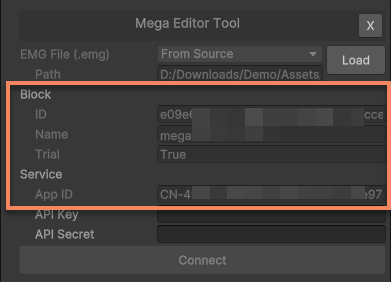
After loading succeeds, part of the Block information is displayed in the editor tool. The APP ID of the service that the Block belongs to is also displayed in the editor tool.
Connect to the service
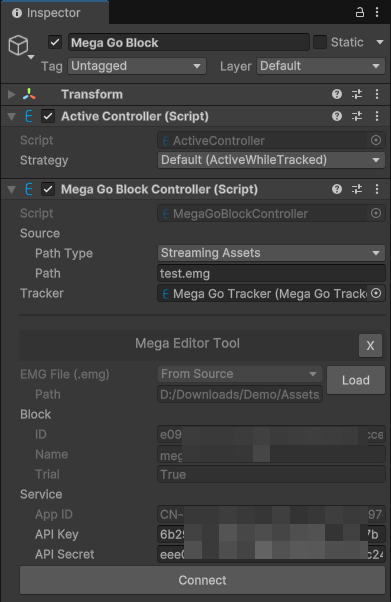
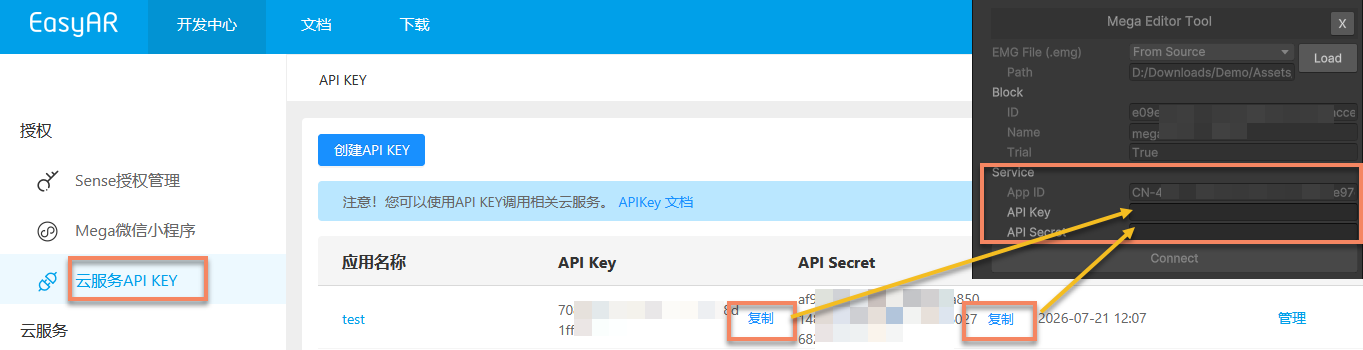
Fill in the API Key and API Secret that can connect to the service, check the service information, and connect to the service.
Tip
API Key and API Secret can be obtained from EasyAR Developer Center.
Make sure the API Key you use has permission to access the Mega Go service.
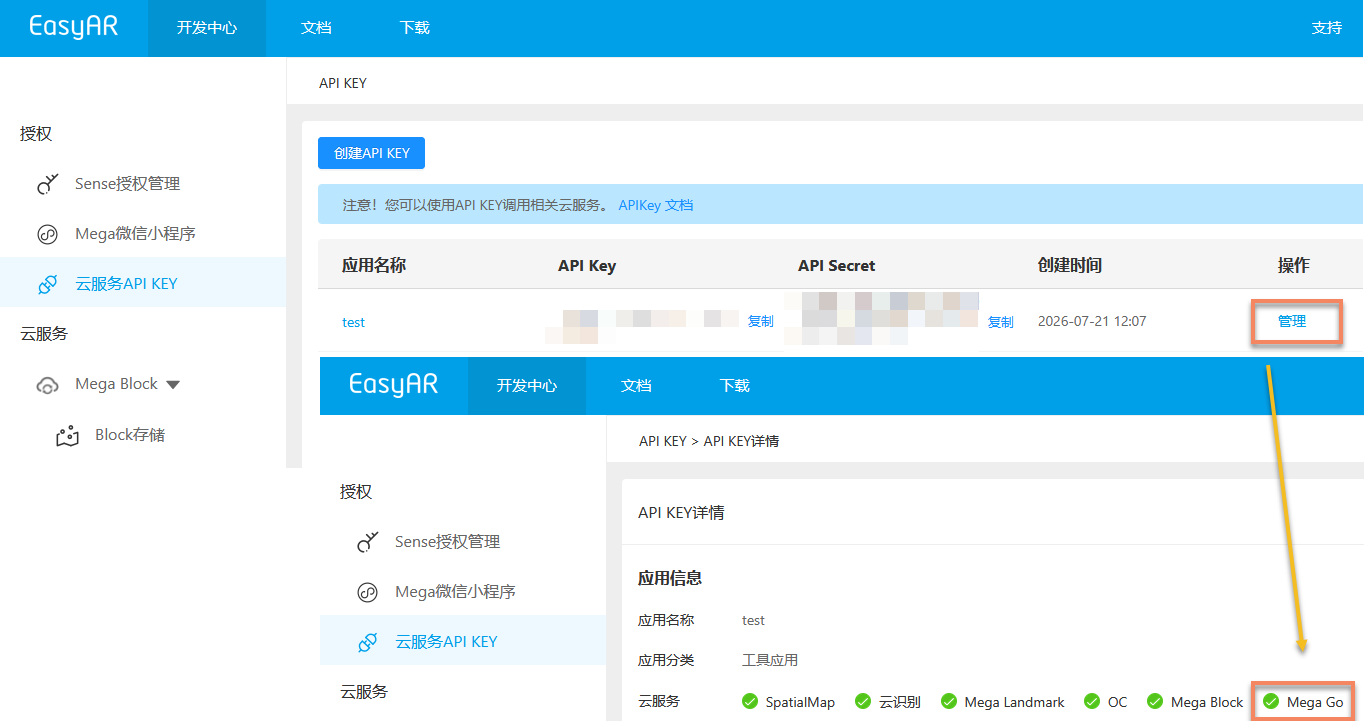
If the permission is insufficient, you will see an error message indicating that service connection verification failed.

After the service is connected normally, you can see the data update time and the block editor data control interface.
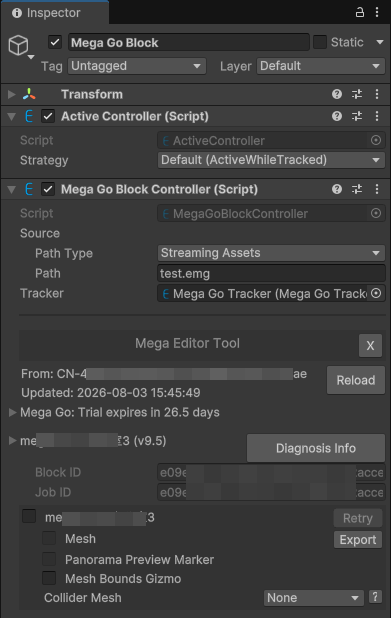
Tip
If the data has expired, you will see a data expiration error message.

Tip
If the data has been upgraded from the trial version but you are still using the trial .emg file, you will see an invalid trial data error message.

Manage tool data in the scene
The editor tool data is stored under the EasyAR.Mega.EditorTool node. Deleting this node is equivalent to deleting the editor tool data.

Caution
Do not directly modify the contents of the EasyAR.Mega.EditorTool node, especially its Transform. Otherwise, the editor tool may not work normally or the content display position may be wrong during tracking.
Important
The Mega Go editor tool can obtain data from the server only within the validity period. After expiration, the editor tool can no longer obtain data such as mesh from the service. Data retained in the computer cache can continue to be used until the EMG file changes. The cache is valid only for the current project.
Replace the EMG file
The block data displayed by the editor tool is not automatically updated when the EMG file changes. After the EMG file is updated, click the X button to delete the editor tool, and then click the Load button to reload the EMG file.
Tip
If the EMG file is loaded from the file path configured in Source, the editor tool automatically resets and returns to the state before file loading after the Source configuration changes.
Caution
If the EMG file loaded at component runtime is different from the file used by the editor tool, the real scene environment may be inconsistent with what is displayed in the editor tool, affecting the accuracy of content placement and the correctness of runtime content display.