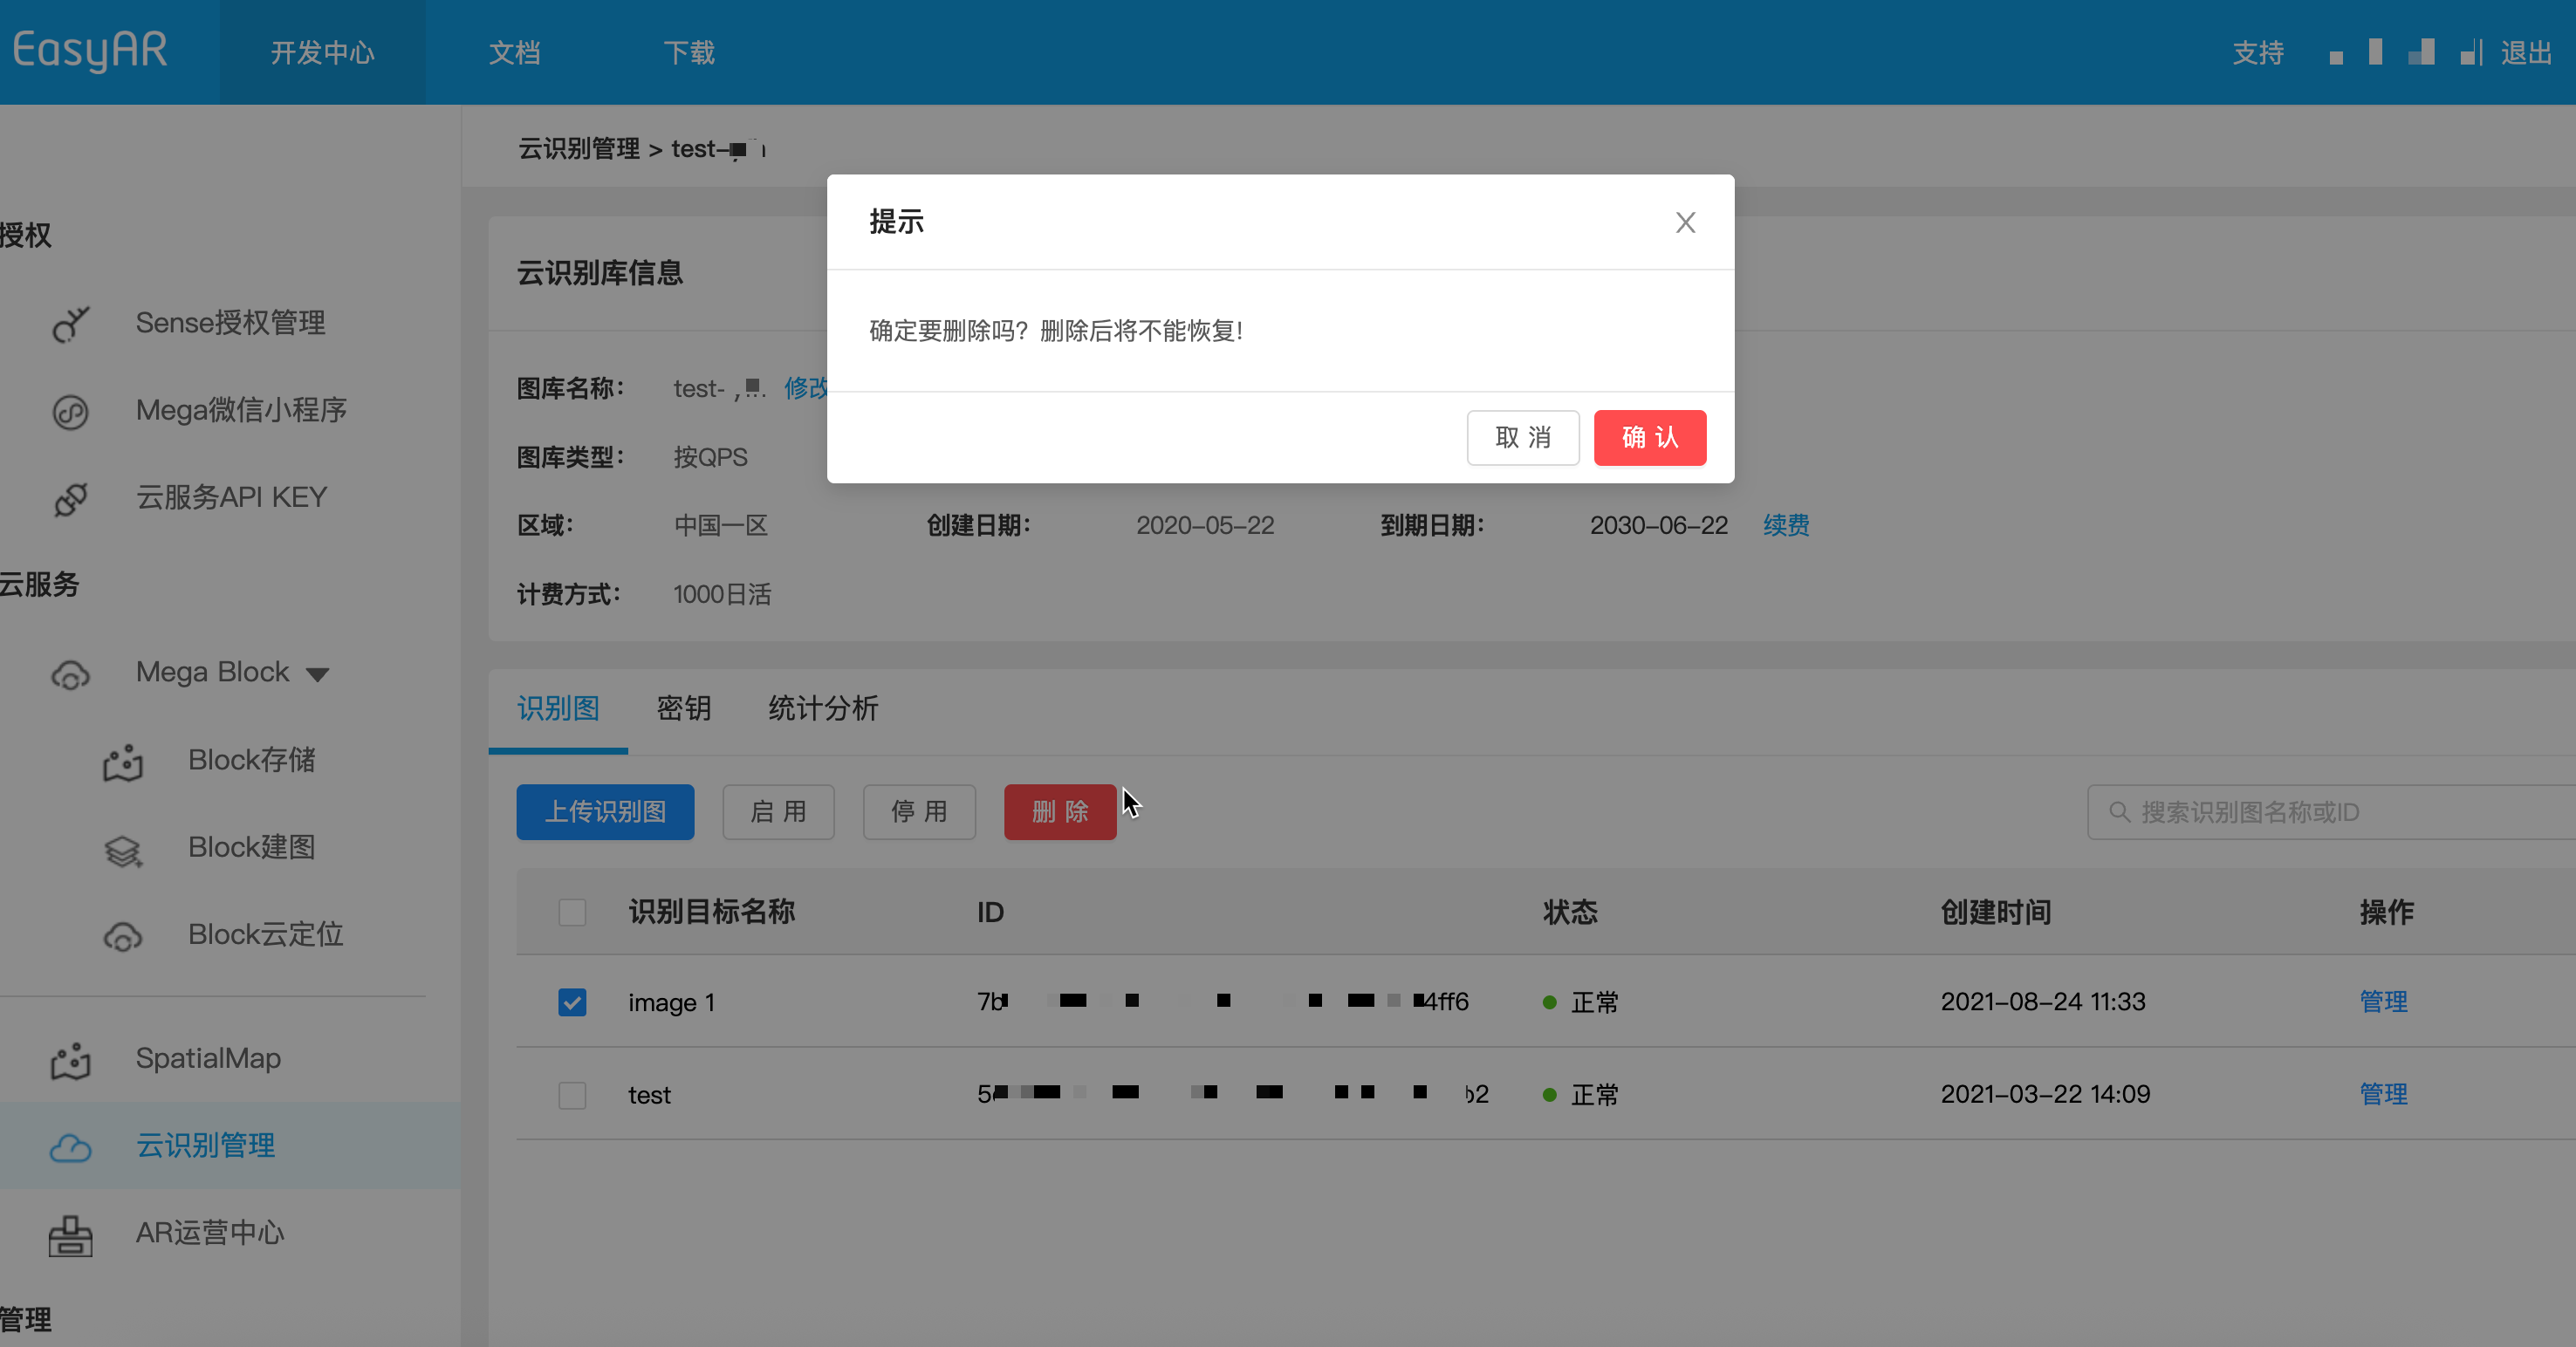
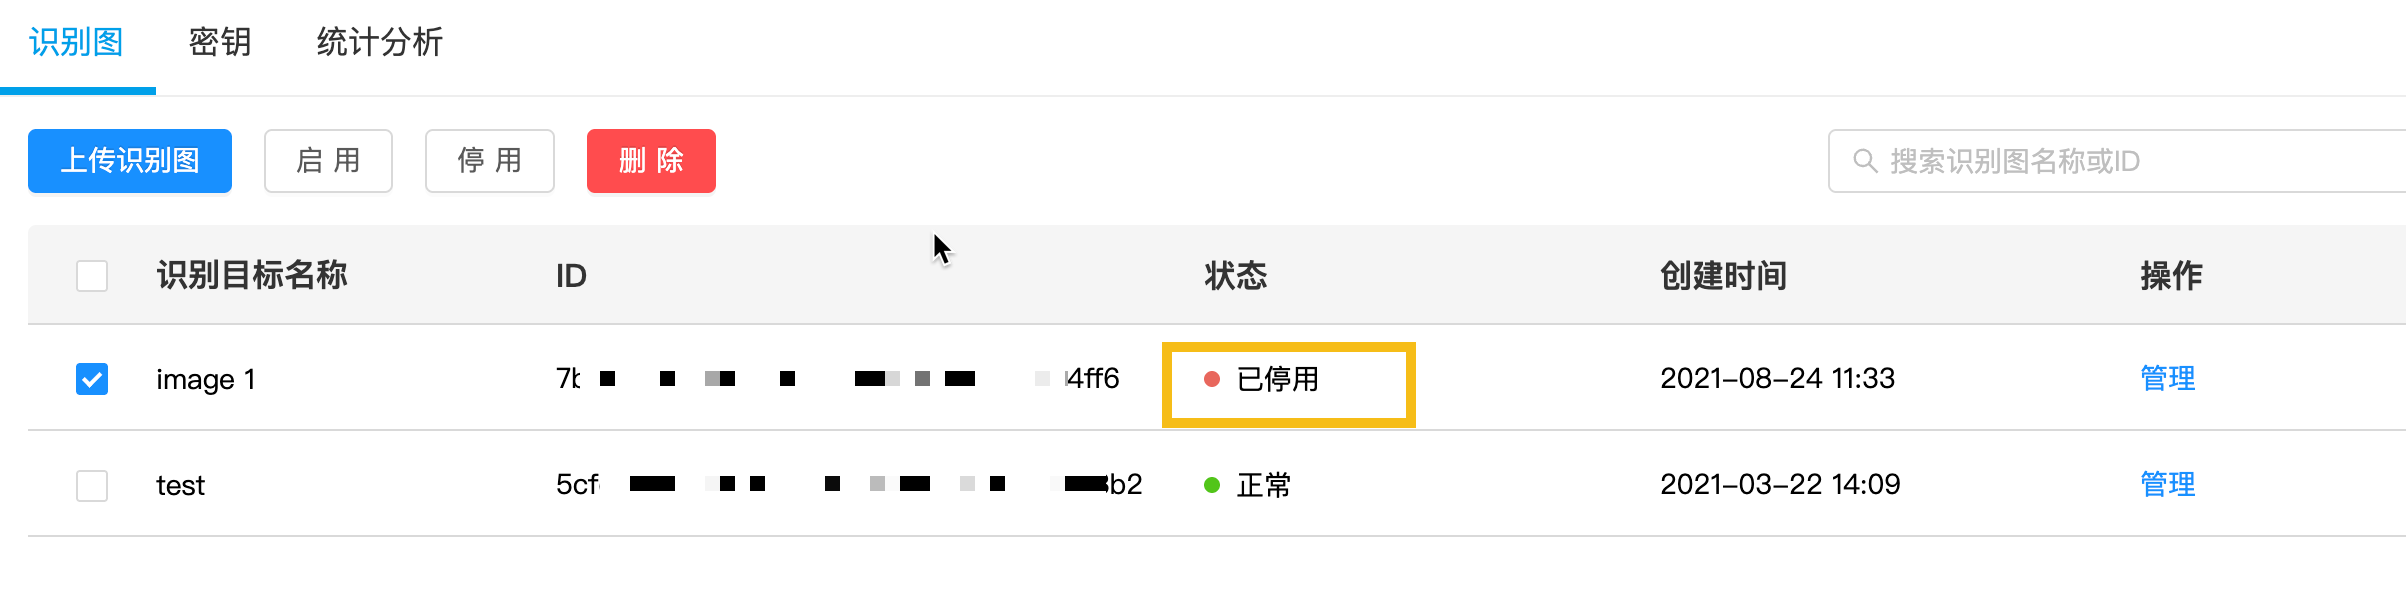
EasyAR menyediakan dua cara untuk menangani recognition image yang tidak lagi diperlukan: penghapusan permanen dan penonaktifan sementara. Untuk menjaga stabilitas lingkungan production, disarankan agar Anda membaca instruksi berikut dengan cermat.
Dalam sebagian besar skenario bisnis, jika Anda tidak yakin apakah sebuah image akan digunakan lagi di masa depan, disarankan menggunakan deactivation sebagai pengganti deletion.
Recognition image dapat dibersihkan secara otomatis melalui REST API.
Ganti placeholder dengan parameter sebenarnya, lalu jalankan skrip curl
- Your-Server-side-URL → API Host sebenarnya
- Your-Token → API Key Authorization Token sebenarnya
- Your-CRS-AppId → appId Anda
- Your-todo-TargetId → targetId target yang akan dihapus
curl -X DELETE "https://<Your Server-side-URL>/target/<Your-todo-TargetId>?appId=<Your-CRS-AppId>" \
  -H "Content-Type: application/json" \
  -H "Authorization: <Your-Token>"
Unduh kode contoh Java
Impor proyek melalui Maven
Step 1. Buka file kode terkait RemoveTarget.java
Step 2. Ubah variabel global dan ganti dengan parameter autentikasi dalam preparation checklist Anda
- CRS AppId
- API Key / API Secret
- TARGET_MGMT_URL -> Server-end URL
- TARGET_ID -> targetId dari target yang akan dihapus
public class RemoveTarget {

    private static final String TARGET_MGMT_URL = "https://cn1.crs.easyar.com";
    private static final String CRS_APPID       = "--here is your CRS AppId--";
    private static final String API_KEY         = "--here is your API Key--";
    private static final String API_SECRET      = "--here is your API Secret--";
    private static final String TARGET_ID       = "my_targetid";
    /* TO_DEL_IDs lists all the targetIds to be removed
     * must be separated by ","
     */
    private static final String TO_DEL_IDs = "targetId1,targetId2,targetId3";

    public String remove(Auth auth, String targetId) throws IOException {
        okhttp3.Request request = new okhttp3.Request.Builder()
                .url(auth.getCloudURL()+"/target/"+targetId+"?"+ Common.toParam(
                        Auth.signParam(new JSONObject(), auth.getAppId(), auth.getApiKey(), auth.getApiSecret())
                ))
                .delete()
                .build();
        return new OkHttpClient.Builder().build().newCall(request).execute().body().string();
    }

    public String removeMultiTargets(Auth auth, String targetIds) throws IOException {
        JSONObject params = new JSONObject().put("targetId", targetIds);
        Auth.signParam(params, auth.getAppId(), auth.getApiKey(), auth.getApiSecret());
        RequestBody requestBody = FormBody.create(MediaType.parse("application/json; charset=utf-8")
                , params.toString());
        okhttp3.Request request = new okhttp3.Request.Builder()
                .url(auth.getCloudURL() + "/targets")
                .delete(requestBody)
                .build();
        return new OkHttpClient.Builder().build().newCall(request).execute().body().string();
    }
    public static void main(String[] args) throws IOException{
        Auth accessInfo  =  new Auth(CRS_APPID, API_KEY, API_SECRET, TARGET_MGMT_URL);
        System.out.println(new RemoveTarget().remove(accessInfo, TARGET_ID));
        System.out.println(new RemoveTarget().removeMultiTargets(accessInfo, TO_DEL_IDs));
    }
}
Step 3. Jalankan Main
Unduh kode sample NodeJS
Step 1. Konfigurasikan file key keys.json
- CRS AppId
- API Key / API Secret
- to-delete-targetId
{
  "appId": "--here is your appId for CRS App Instance for SDK 4--",
  "apiKey": "--here is your api key which is create from website and which has crs permission--",
  "apiSecret": "--here is your api secret which is create from website--"
}
Step 2. Jalankan, lalu tentukan file key dan Server-end URL
node bin/deleteTarget <to-delete-targetId> -t <Server-end-URL> -c keys.json
var argv = require('yargs')
    .usage('Usage: $0 [targetId] -t [host] -c [keys]')
    .demand(1)
    .default('t', 'http://localhost:8888').alias('t', 'host')
    .default('c', 'keys.json').alias('c', 'keys')
    .help('h').alias('h', 'help')
    .epilog('copyright 2015, sightp.com')
    .argv;

var fs = require('fs');

var targetId = argv._[0];
var host = argv.host;
var keys = JSON.parse(fs.readFileSync(argv.keys));

var farmer = require('../farmer')(host, keys.appKey, keys.appSecret);

farmer.deleteTarget(targetId)
.then(function(resp) {
    console.log(resp.result.targetId);
})
.fail(function(err) {
    console.log(err);
});
deleteTarget memanggil API layanan cloud. Kode sample ada di farmer.js.
function deleteTarget(targetId) {
    return Q.promise(function(resolve, reject) {
        request.del(host + '/target/' + targetId)
        .query(signParams())
        .end(done(resolve, reject));
    });
}
Unduh kode contoh PHP.
Step 1. Buka kode entri demo.php.
Step 2. Ubah variabel global dan ganti dengan parameter autentikasi dalam daftar yang telah Anda siapkan.
- CRS AppId
- API Key / API Secret
- Server-end URL
- toDeleteTargetId
<?php
include 'EasyARClientSdkCRS.php';
$apiKey = 'API Key';
$apiSecret = 'API Secret';
$crsAppId = 'CRS AppId'
$crsCloudUrl = 'https://cn1-crs.easyar.com';
$toDeleteTargetId = 'to-delete-targetId';

$sdk = new EasyARClientSdkCRS($apiKey, $apiSecret, $crsAppId, $crsCloudUrl);

$rs = $sdk->delete($toDeleteTargetId);
if ($rs->statusCode == 0) {
  print_r($rs->result);
} else {
  print_r($rs);
}
Step 3. Jalankan php demo.php.
Buat file kode terkait delete_target.py, ubah variabel global, lalu jalankan
pip install requests
python delete_target.py
import time
import hashlib
import requests

# --- konfigurasi variabel global ---
API_KEY = "YOUR_API_KEY"
API_SECRET = "YOUR_API_SECRET"
APP_ID = "YOUR_APP_ID"
HOST = "https://crs-cn1.easyar.com"
TARGET_ID = "TARGET_ID"

def main():
    timestamp = str(int(time.time() * 1000))

    params = {
        'apiKey': API_KEY,
        'appId': APP_ID,
        'timestamp': timestamp
    }

    sorted_keys = sorted(params.keys())
    sign_str = "".join([f"{k}{params[k]}" for k in sorted_keys]) + API_SECRET
    signature = hashlib.sha256(sign_str.encode('utf-8')).hexdigest()

    url = f"{HOST}/target/{TARGET_ID}"
    final_params = {**params, 'signature': signature}

    print(f"Requesting DELETE {url}...")
    response = requests.delete(url, params=final_params)
    print(f"Response: {response.text}")

if __name__ == "__main__":
    main()
Buat file kode terkait main.go, ubah global variables, lalu jalankan
go run main.go
main.go:
package main
import (
"crypto/sha256"
"fmt"
"io"
"net/http"
"sort"
"strconv"
"time"
)
var (
ApiKey = "YOUR_API_KEY"
ApiSecret = "YOUR_API_SECRET"
AppId = "YOUR_APP_ID"
Host = "https://crs-cn1.easyar.com"
TargetId = "TARGET_ID"
)
func main() {
ts := strconv.FormatInt(time.Now().UnixNano()/1e6, 10)
params := map[string]string{
"apiKey": ApiKey,
"appId": AppId,
"timestamp": ts,
}
keys := make([]string, 0, len(params))
for k := range params { keys = append(keys, k) }
sort.Strings(keys)
builder := ""
for _, k := range keys { builder += k + params[k] }
builder += ApiSecret
signature := fmt.Sprintf("%x", sha256.Sum256([]byte(builder)))
url := fmt.Sprintf("%s/target/%s?apiKey=%s&appId=%s×tamp=%s&signature=%s",
Host, TargetId, ApiKey, AppId, ts, signature)
req, _ := http.NewRequest("DELETE", url, nil)
resp, _ := http.DefaultClient.Do(req)
defer resp.Body.Close()
body, _ := io.ReadAll(resp.Body)
fmt.Printf("Response: %s
", string(body))
}
Tambahkan dependency reqwest, tokio, sha2, dan hex di Cargo.toml.
Jalankan cargo run.
use sha2::{Sha256, Digest};
use std::collections::BTreeMap;
use std::time::{SystemTime, UNIX_EPOCH};
const API_KEY: &str = "YOUR_API_KEY";
const API_SECRET: &str = "YOUR_API_SECRET";
const APP_ID: &str = "YOUR_APP_ID";
const HOST: &str = "https://crs-cn1.easyar.com";
const TARGET_ID: &str = "YOUR_TARGET_ID";
#[tokio::main]
async fn main() -> Result<(), Box<dyn std::error::Error>> {
let ts = SystemTime::now().duration_since(UNIX_EPOCH)?.as_millis().to_string();
let mut params = BTreeMap::new();
params.insert("apiKey", API_KEY);
params.insert("appId", APP_ID);
params.insert("timestamp", &ts);
let mut sign_str = String::new();
for (k, v) in ¶ms {
sign_str.push_str(k);
sign_str.push_str(v);
}
sign_str.push_str(API_SECRET);
let mut hasher = Sha256::new();
hasher.update(sign_str.as_bytes());
let signature = hex::encode(hasher.finalize());
let url = format!("{}/target/{}?apiKey={}&appId={}×tamp={}&signature={}",
HOST, TARGET_ID, API_KEY, APP_ID, ts, signature);
let res = reqwest::Client::new().delete(url).send().await?;
println!("Response: {}", res.text().await?);
Ok(())
}
Buat proyek konsol .NET.
dotnet new console
dotnet run
using System;
using System.Collections.Generic;
using System.Linq;
using System.Security.Cryptography;
using System.Text;
using System.Net.Http;

class Program {
    static string API_KEY = "API_KEY";
    static string API_SECRET = "API_SECRET";
    static string APP_ID = "APP_ID";
    static string HOST = "https://crs-cn1.easyar.com";
    static string TARGET_ID = "TARGET_ID";

    static async System.Threading.Tasks.Task Main() {
        string timestamp = DateTimeOffset.Now.ToUnixTimeMilliseconds().ToString();

        var dict = new SortedDictionary<string, string> {
            { "apiKey", API_KEY },
            { "appId", APP_ID },
            { "timestamp", timestamp }
        };

        StringBuilder sb = new StringBuilder();
        foreach (var kv in dict) sb.Append(kv.Key).Append(kv.Value);
        sb.Append(API_SECRET);

        string signature = Sha256(sb.ToString());

        using var client = new HttpClient();
        string query = string.Join("&", dict.Select(x => $"{x.Key}={x.Value}")) + $"&signature={signature}";
        string url = $"{HOST}/target/{TARGET_ID}?{query}";

        var response = await client.DeleteAsync(url);
        Console.WriteLine($"Result: {await response.Content.ReadAsStringAsync()}");
    }

    static string Sha256(string str) {
        byte[] bytes = SHA256.HashData(Encoding.UTF8.GetBytes(str));
        return BitConverter.ToString(bytes).Replace("-", "").ToLower();
    }
}
- Lingkungan runtime
- Unity 2020 LTS atau versi lebih baru
- Scripting Backend: Mono atau IL2CPP keduanya dapat digunakan
- API Compatibility Level: .NET Standard 2.1 (direkomendasikan)
Step 1: Siapkan file gambar
- Buat direktori di proyek Unity:
Assets/
└── Scripts/
     └── DeleteImageTarget.cs
using System.Collections;
using UnityEngine;
using UnityEngine.Networking;

public class DeleteImageTarget : MonoBehaviour
{
    [Header("Config")]
    public string targetId = "Your targetId";
    public string apiBaseUrl = "https://Your-Server-end-URL";
    public string authorizationToken = "YOUR API KEY AUTH TOKEN";
    public string crsAppId = "CRS-AppId";

    private void Start()
    {
        StartCoroutine(DeleteTarget());
    }

    private IEnumerator DeleteTarget()
    {

        string url =
            $"{apiBaseUrl}/target/{targetId}?appId={crsAppId}";

        UnityWebRequest request = UnityWebRequest.Delete(url);
        request.downloadHandler = new DownloadHandlerBuffer();

        request.SetRequestHeader("Content-Type", "application/json");
        request.SetRequestHeader("Authorization", authorizationToken);

        yield return request.SendWebRequest();

        if (request.result == UnityWebRequest.Result.Success)
        {
            Debug.Log("Delete target success:");
            Debug.Log(request.downloadHandler.text);
        }
        else
        {
            Debug.LogError("Delete target failed:");
            Debug.LogError(request.error);
            Debug.LogError(request.downloadHandler.text);
        }
    }
}
Step 3: Konfigurasikan parameter (Inspector)
Step 4: Jalankan
- Klik Play
- Lihat hasil di Console:
- Berhasil: mengembalikan JSON (termasuk targetId)
- Gagal: HTTP / informasi error