Use EasyAR samples on XR headsets or glasses
EasyAR provides unified samples for all headsets. The samples contain no code; all behavior is implemented through scene configuration. For how to use each feature itself, refer to the sample implementations of the corresponding features on Android/iOS phones.
The headset sample name is Combination_BasedOn_*, for example the Pico sample is Combination_BasedOn_Pico. This sample demonstrates most EasyAR features in one scene. They can be turned on and off dynamically, used individually, or enabled at the same time.
Preparation
- Make sure your headset or glasses are currently in the EasyAR support list.
- Download and import the EasyAR Unity package.
- Download and import the EasyAR Unity XR device extension package.
- Obtain an EasyAR license suitable for XR headsets or glasses. The available License types for headsets or glasses include:
- EasyAR Sense 4.x XR License trial version (trial, enabled by yourself on the EasyAR website)
- EasyAR Sense 4.x XR License official version (available after payment; contact sales to purchase and enable it)
- EasyAR Sense 4.x XR License enterprise version (for enterprise SDK use)
Caution
On headsets and glasses, only XR License is allowed. A regular License cannot be used for EasyAR features.
Import official samples
Samples for built-in supported devices are included in the EasyAR Unity package. Import the samples you need separately according to the device.
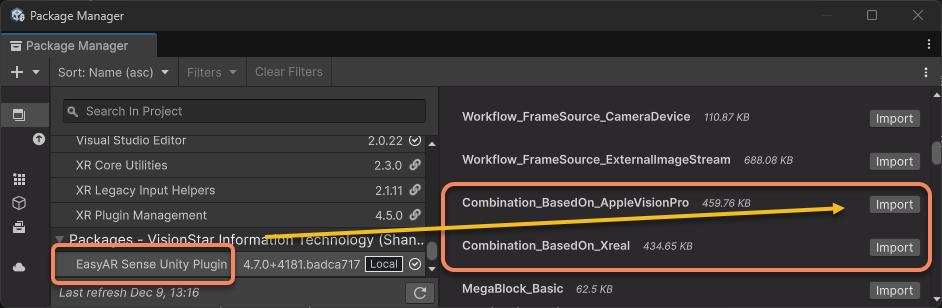
Samples for devices supported through extensions are distributed with the corresponding headset extensions. You can use Unity to import the samples into the project. Pico is used as an example.
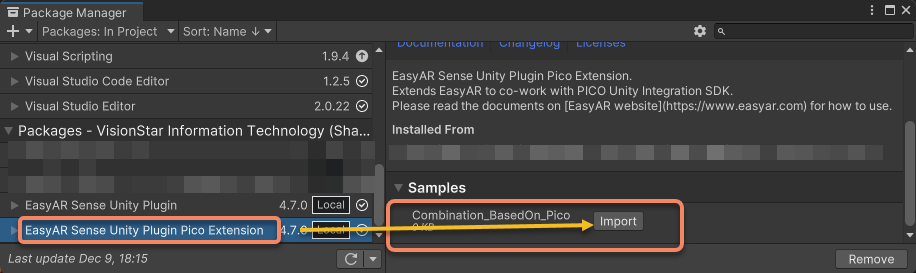
Package and run the sample
Complete the headset project configuration and the sample usage instructions respectively.
Strictly follow the official documentation and instructions of the corresponding headset to complete the required configuration. EasyAR documentation does not cover this content.
Configure each platform according to the EasyAR documentation.
Android: refer to Android project configuration
visionOS: refer to visionOS project configuration
In addition to the Android platform settings, Meta XR/Quest also requires Meta XR/Quest project configuration
In addition to the Android platform settings, XREAL also requires XREAL project configuration
Package the sample Package the sample in Unity and deploy it to the device. For details, see Run samples in Unity.
Usage
The sample has several built-in buttons. Their specific functions are as follows.
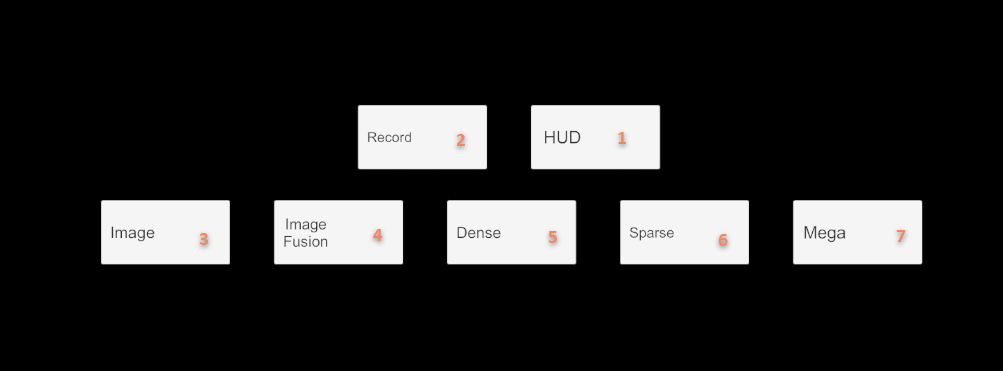
- Button 1
HUD: switches the UI display mode. In the initial state, the UI is fixed in the real world. After HUD is enabled, the UI is always displayed in front of your eyes. - Button 2
Record: turns EIF recording on or off. After it is turned on, it must be turned off before a valid EIF file can be recorded; otherwise the recorded file cannot be used. - Button 3
Image: turns image tracking on or off. - Button 4
Image Fusion: turns image tracking + motion fusion mode on or off. - Button 5
Dense: turns dense spatial mapping on or off. - Button 6
Sparse: turns sparse spatial mapping on or off. - Button 7
Mega: turns Mega on or off.
Feature details
Default feature switches
All features are off by default at startup. This is implemented by disabling the corresponding scripts in the editor. Button operations enable or disable the corresponding scripts. You can set which features are enabled by default according to the sample you actually want to run.
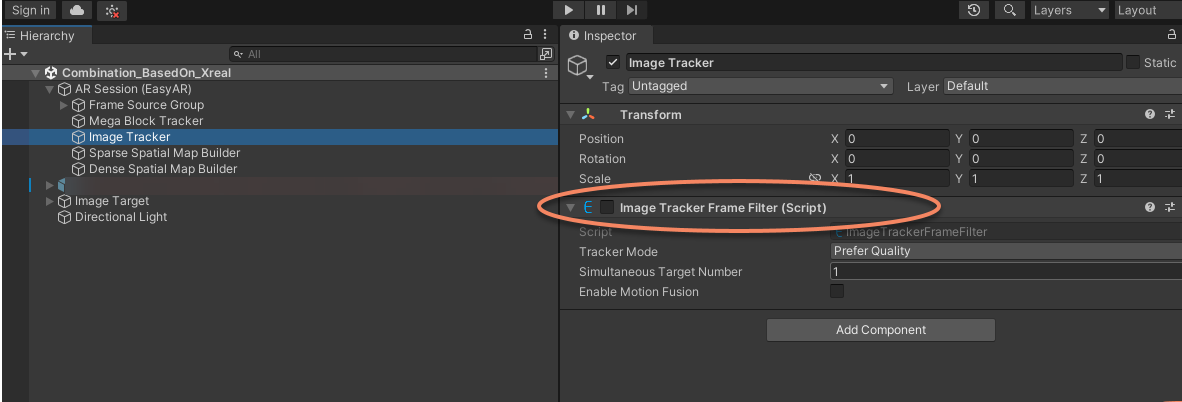
Coordinate system origin reference
In the sample, a stationary panda model is placed at the coordinate system origin of motion tracking to check the motion tracking state. This model helps decouple problems. For example, when running Mega, some rapid drift is caused by device motion tracking (that is, defects of the device itself). In that case, this model will drift together as well. You can adjust or delete the panda model as needed.
Use the recognition image for embedded image tracking
The sample presets the image size used for planar image tracking. You need to print namecard.jpg on A4 paper. Keep the image aspect ratio unchanged, do not stretch or crop it, and make it fill the paper as much as possible (shown below).

Measure the length of the name card pattern on the printed paper. According to the measurement result, set the
ScaleofImage Targetin the Unity scene to be consistent with the real physical size (unit: meters).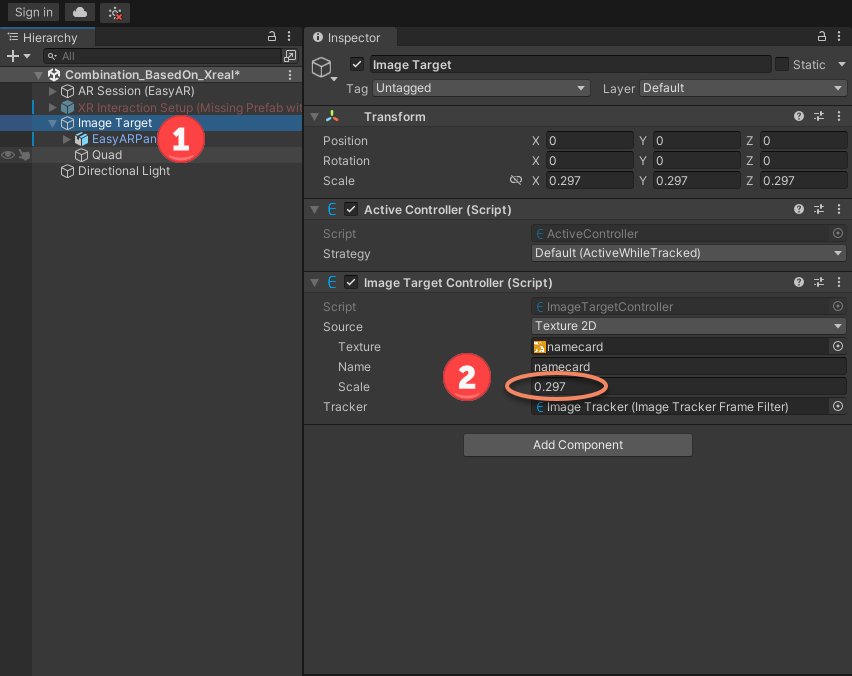
When
EasyAR motion fusionis enabled, only images at fixed positions (not movable) can be tracked. If motion fusion is disabled, the image cannot be tracked once it leaves the field of view.Sometimes the glasses view cannot accurately reflect the camera image size. If recognition fails, try moving the glasses camera closer to the image. In actual use, it is recommended to track larger images, such as 5 m * 5 m.
Note
On headsets, whether EasyAR motion fusion is on or off, the image target Scale parameter must be set to the real physical size; otherwise the display position will be wrong.
Mega configuration
If you are using EasyAR Mega, refer to Mega Unity quickstart.