Meta XR/Quest project configuration method
This chapter describes how to configure a Unity project to use EasyAR features on Meta XR/Quest headsets.
Preparation
- Learn how to use headset samples
- Obtain an EasyAR license suitable for XR headsets
- EasyAR Sense 4.x XR License trial version (trial, enabled by yourself on the EasyAR website)
- EasyAR Sense 4.x XR License official version (available after payment)
- EasyAR Sense 4.x XR License enterprise version (for enterprise SDK use)
- When using sample scenes, if URP is used, first update the URP assets in the samples
- Refer to Android project configuration
Import MRUK (Mixed Reality Utility Kit)
Import com.easyar.sense.ext.meta.xr by using the Package Manager window. MRUK will be imported automatically.
If you need to specify an MRUK version, refer to the Meta official documentation and add com.meta.xr.mrutilitykit to Packages/manifest.json.
For example, to use version 205, add:
"com.meta.xr.mrutilitykit": "205.0.0",
Note
- MRUK automatically introduces Meta XR Core SDK
- EasyAR does not depend on other Meta packages. Add them according to actual needs
Configure the common Meta XR/Quest development environment
Configure it by referring to the Meta getting started documentation. Pay attention to the following:
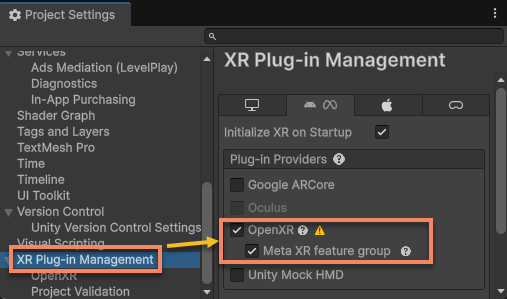
Install XR Plugin Management and enable OpenXR.
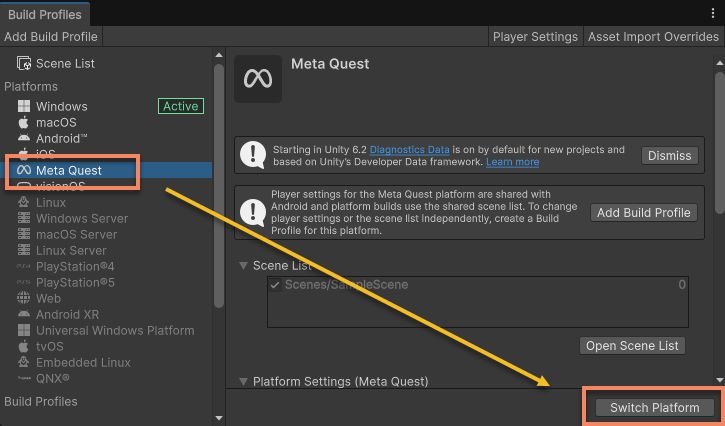
Switch to the Meta Quest platform (use the Android platform in Unity < 6.1).
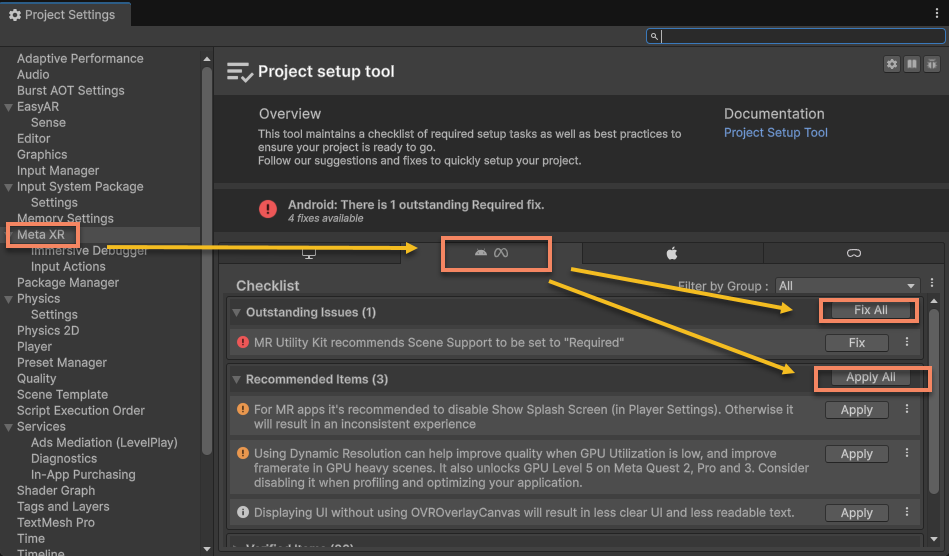
Use
Project Setup Toolto update the configuration. On the Meta (Android) page, clickFix AllandApply All.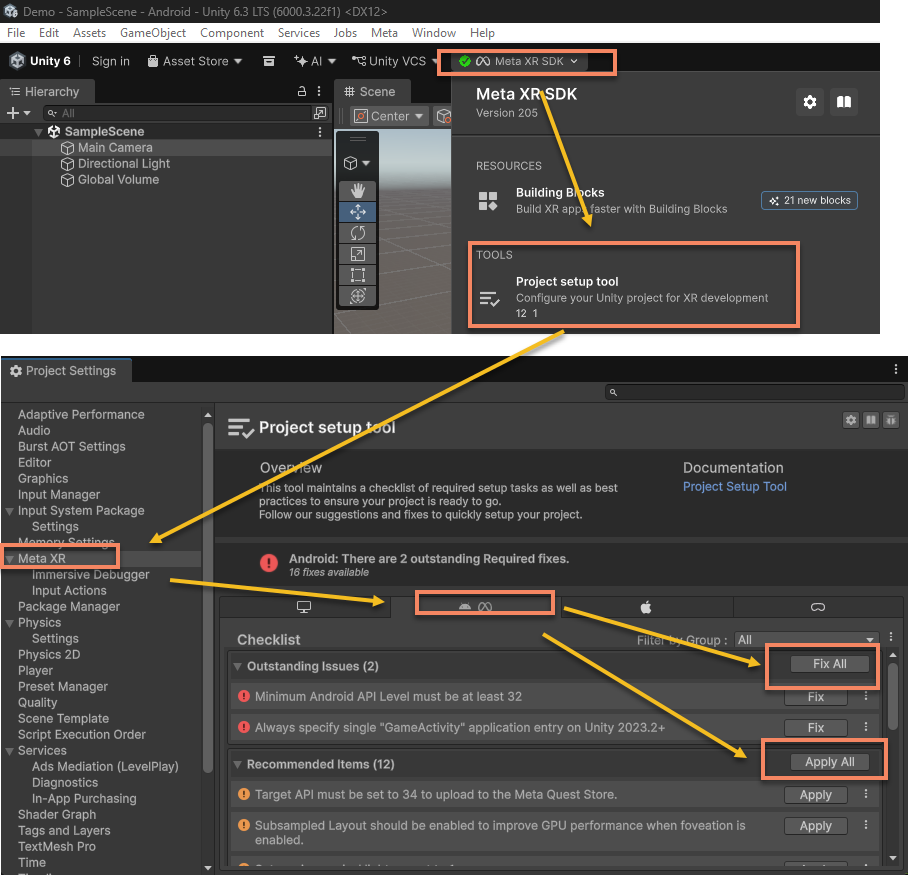
Use
Project validationto update the configuration. On the Meta (Android) page, clickFix All.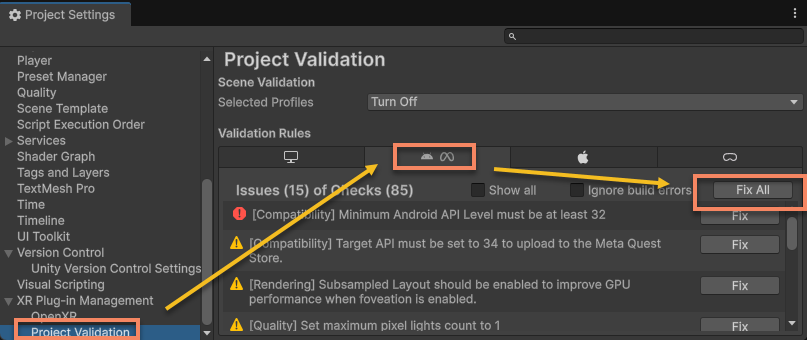
Enable Passthrough
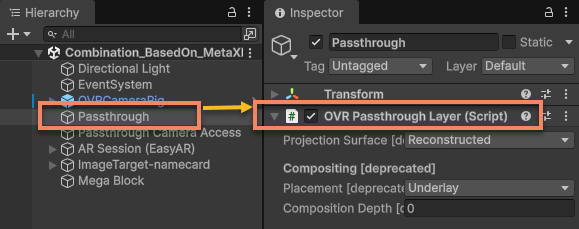
If there is no OVR Passthrough Layer component in the scene, add it first.
Tip
Create an empty GameObject in the scene, click Add Component in its Inspector panel, and select OVR Passthrough Layer under Scripts.
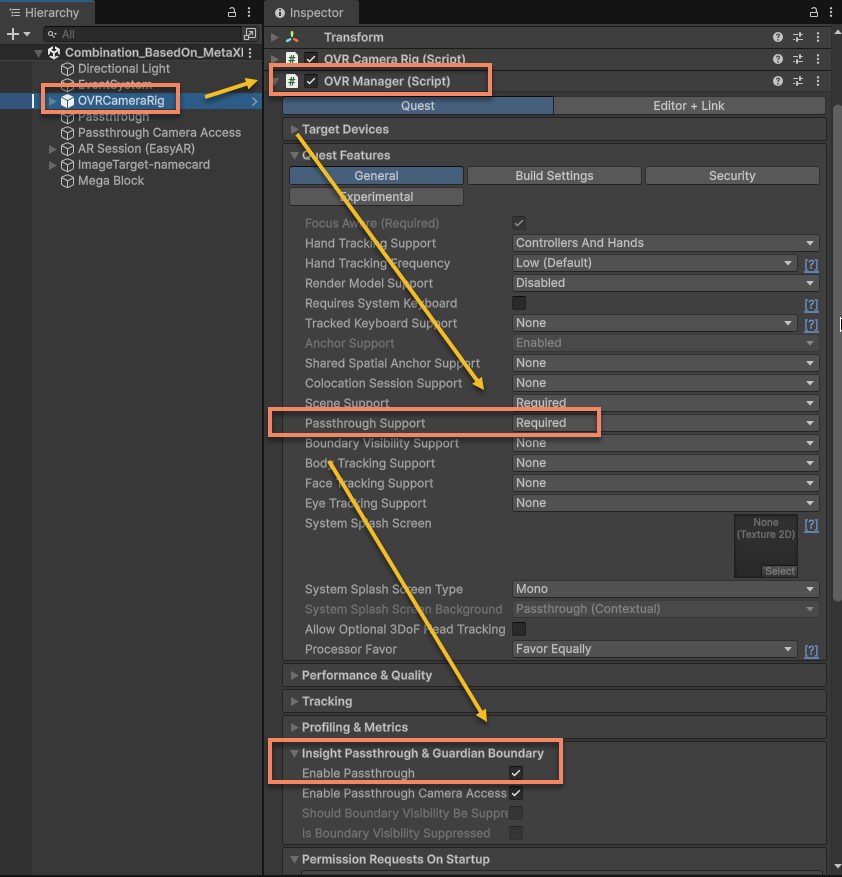
Select the Camera Rig object in the scene and modify the OVR Manager options:
- Change
Quest Features>General>Passthrough Supportand selectRequiredorSupportedto enable the components required for Passthrough during build. - Change
Insight Passthrough & Guardian Boundary>Enable Passthroughand enable this option to initialize Passthrough when the application starts. You can also initialize it later through a C# script.
Then use Project Setup Tool to update the configuration. On the Meta (Android) page, click Fix All and Apply All.
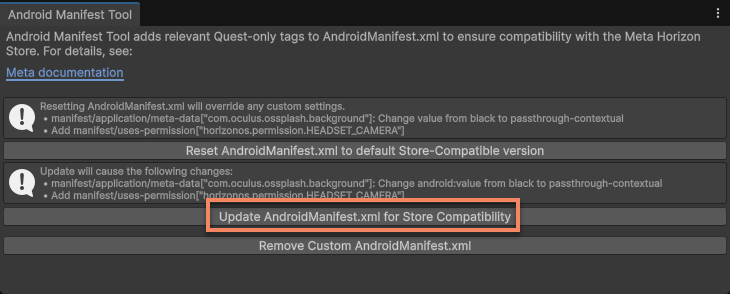
Finally, use the menu Meta > Tools > Android Manifest Tool to open the Meta Android Manifest tool, and click Update AndroidManifest.xml for Store Compatibility to update AndroidManifest.xml. If the configuration is already correct, the button will be grayed out.
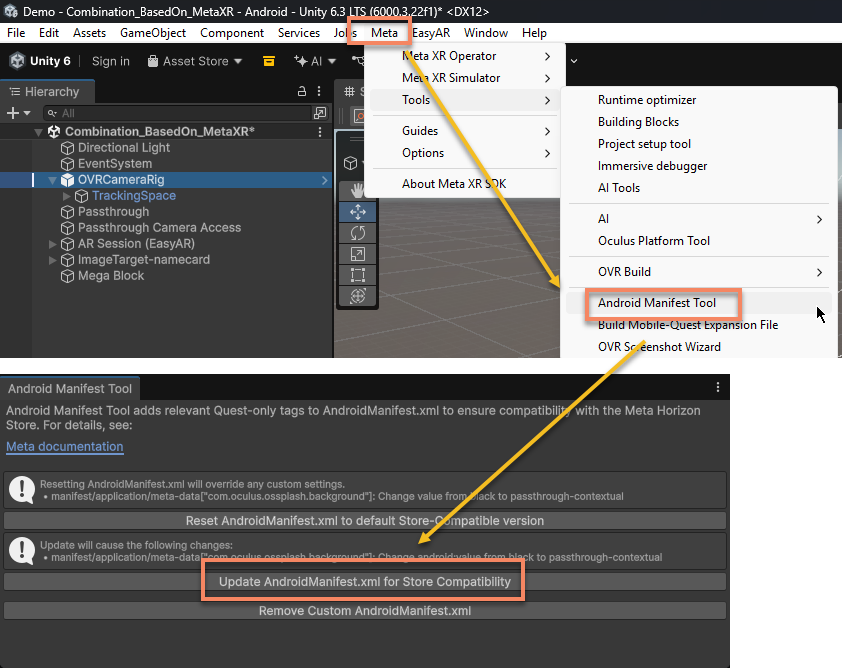
Important
- When opening a scene configured with Passthrough,
Project Setup Toolwill show different content, so update the configuration after configuration. - This is project configuration and is not saved in the scene. Sample scenes still need to be configured.
Enable Passthrough Camera Access
If there is no Passthrough Camera Access component in the scene, add it first.
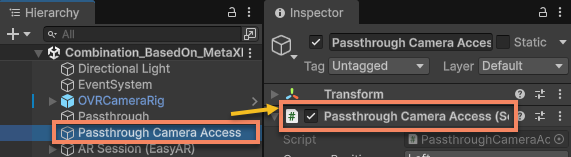
Tip
Create an empty GameObject in the scene, click Add Component in its Inspector panel, and select Passthrough Camera Access under Scripts.
Select the Camera Rig object in the scene and modify the OVR Manager options:
- Change
Insight Passthrough & Guardian Boundary>Enabled Passthrough Camera Accessand enable this option.
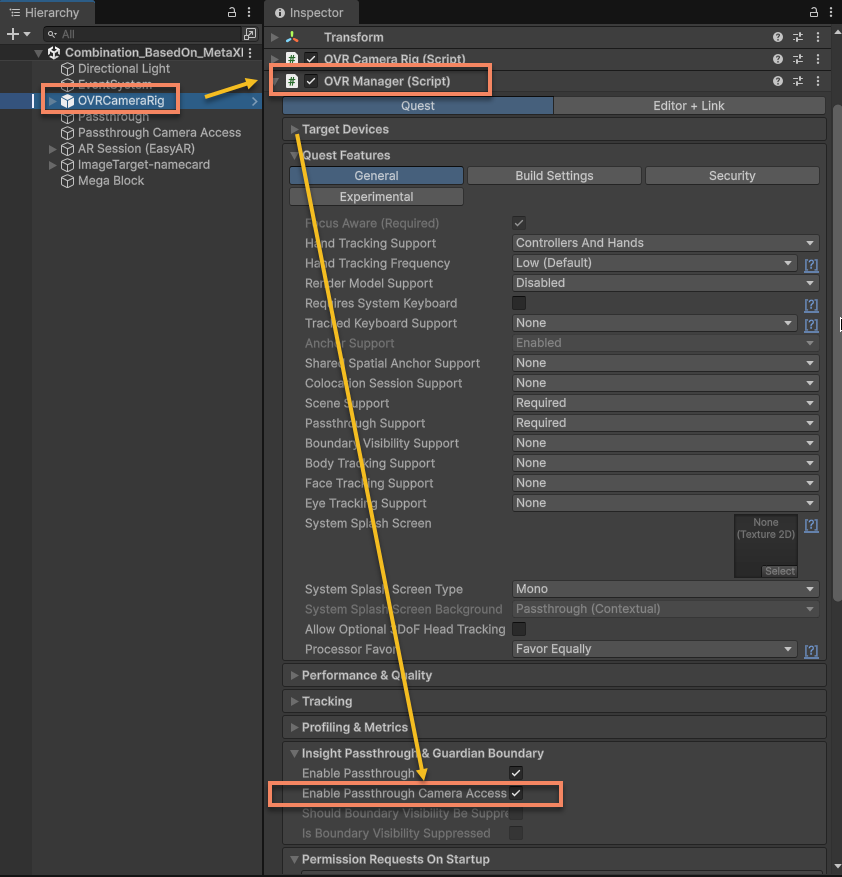
Then use Project Setup Tool to update the configuration. On the Meta (Android) page, click Fix All and Apply All.
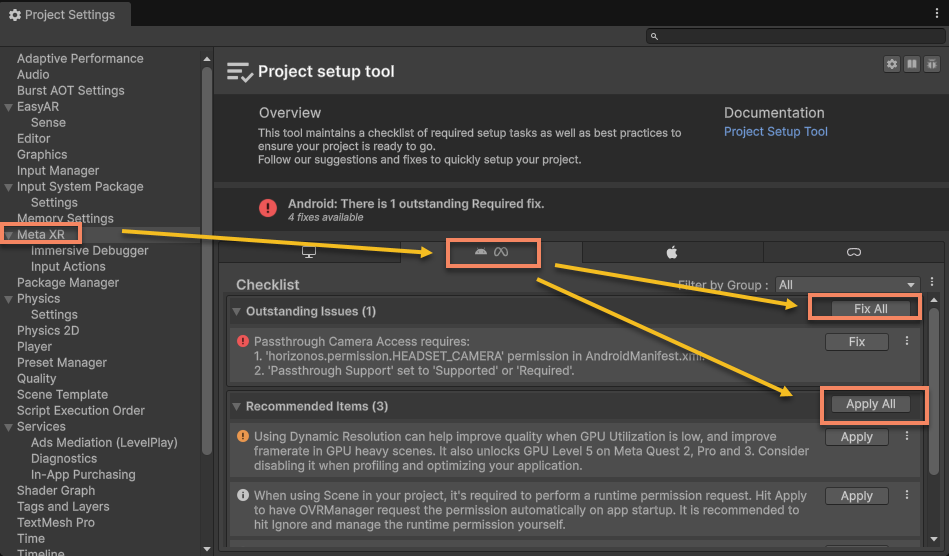
Finally, use the menu Meta > Tools > Android Manifest Tool to open the Meta Android Manifest tool, and click Update AndroidManifest.xml for Store Compatibility to update AndroidManifest.xml. If the configuration is already correct, the button will be grayed out.
Important
- When opening a scene configured with Passthrough Camera Access,
Project Setup Toolwill show different content, so update the configuration after configuration. - This is project configuration and is not saved in the scene. Sample scenes still need to be configured.
[Optional] Features and configurations that can be disabled
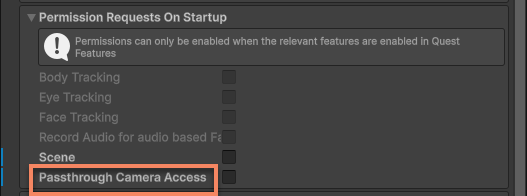
Meta Project Setup Tool configures requesting the Passthrough Camera Access permission at startup, but this is not required for EasyAR. MetaXRFrameSource will request permission before obtaining data. Disable this configuration if needed.
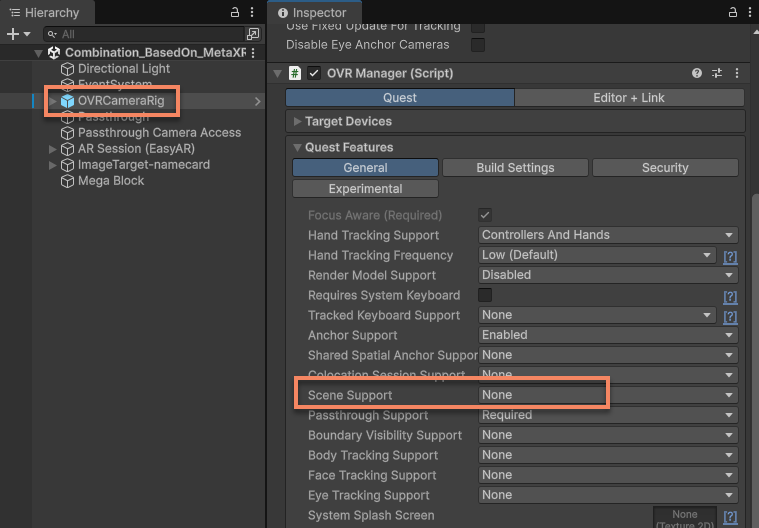
Meta Project Setup Tool configures support for enabling the Scene feature, but EasyAR does not use this feature. Disable it if needed.
Passthrough Camera Access does not require the Android camera permission android.permission.CAMERA. If you do not want to keep this permission in the final application, disable the Camera permission in EasyAR configuration.
Runtime authorization
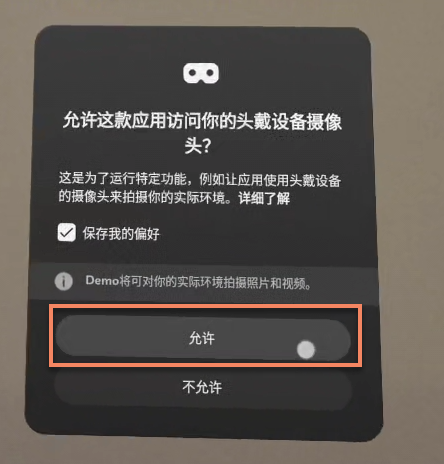
After the application starts, Passthrough Camera Access will automatically request authorization. The user needs to select Allow in the authorization dialog.
Note
If the camera permission is accidentally denied during use, you may need to uninstall and reinstall the application before continuing. You can also check in the application whether the user denied the permission request.
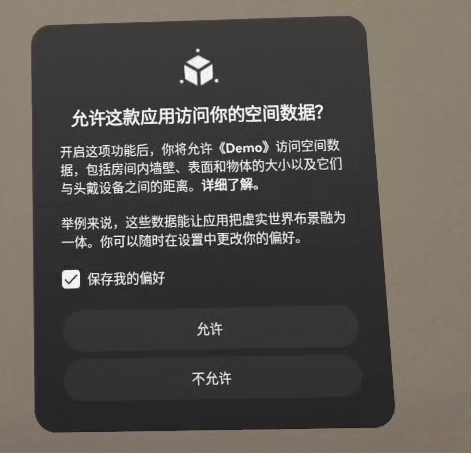
EasyAR does not require spatial data authorization. If a spatial data authorization dialog appears at runtime, you can select any option in the dialog, unless other features of the application require this authorization.