使用 Mega 插件實現遮擋
遮擋 (Occlusion) 是提升 AR 虛實融合沉浸感的關鍵技術。本文將指導您如何在 xr-frame 環境下,通過 EasyAR 雲定位與標注實現遮擋效果。
開始之前
遮擋的實現方式
離線建模:利用 Unity 編輯器在 Block 坐標系下,針對現實世界中的實體(如牆體、立柱、大型設備)創建 1:1 匹配的幾何體;或通過對 Block 稠密模型進行裁剪與減面處理得到優化後的模型。
運行時對齊:在 xr-frame 運行時,通過雲定位將 Block 坐標系與現實空間對齊,並加載對應的幾何體。
材質替換:為這些幾何體賦予特殊的遮擋材質。
視覺效果:當 GPU 渲染其他虛擬物體時,會因深度測試未通過而自動剔除被遮擋部分的像素,從而使虛擬物體遵循現實物理空間的遮擋邏輯。
如何佈置簡單幾何體的遮擋
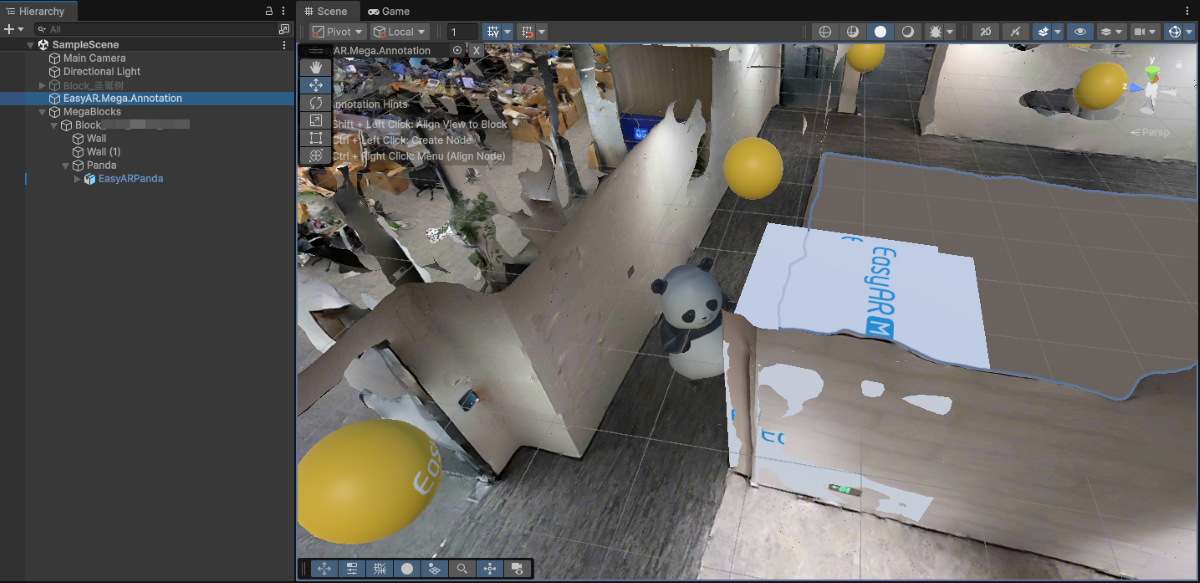
對照稠密模型及全景圖精確擺放方塊標注。擺放後標注看起來就像是一面「牆」或者「柱子」。
修改標注的名稱(如
occlusion_wall),記錄 ID ,上傳標注。在 xr-frame 小程序中利用其內置幾何體加載作為遮擋的標注。
在 EMA 加載的回調中使用
scene.createElement(xrFrameSystem.XRMesh,{})創建簡單的幾何體賦予easyar-occulusion材質。附註
easyar-occulusion材質的加載,註冊,反註冊,卸載由 AR Session 控制。
handleEmaResult(ema: easyar.ema.v0_5.Ema) {
    let blockHolder: easyar.BlockHolder = session.blockHolder;
    ema.blocks.forEach(emaBlock => {
        const blockInfo: easyar.BlockInfo = {
            id: emaBlock.id
        };
        // 若 Block 節點不存在,創建 Block 節點
        blockHolder.holdBlock(blockInfo, easyarPlugin.toXRFrame(emaBlock.transform));
    });
    ema.annotations.forEach(annotation => {
        if (annotation.type != mega.EmaV05AnnotationType.Node) {
            return;
        }
        const nodeAnnotation = annotation as easyar.ema.v0_5.Node;
        const xrNode: xrfs.XRNode = easyarPlugin.createXRNodeFromNodeAnnotation(nodeAnnotation, blockHolder);
        const emaName: string = nodeAnnotation.name;
        const geometryStr: string = nodeAnnotation.geometry === "cube" ? "cube" : "sphere";
        const assetInfo = AnnotationMetaData[nodeAnnotation.id as keyof typeof AnnotationMetaData];
        let model: xrfs.Element;

        if (assetInfo) {
            // GLTF部分
        } else {
            model = scene.createElement(
                xrFrameSystem.XRMesh,
                {
                    // 使用插件註冊好的遮擋材質
                    material: "easyar-occlusion",
                    // 使用 xr-frame 內置幾何體,此處也可以直接使用 "cube"
                    geometry: geometryStr,
                    name: emaName,
                    "receive-shadow": "false",
                    "cast-shadow": "false"
                    // 注意不要修改 Scale
                }
            );
            xrNode.addChild(model);
        }
    })
}
<video src="https://doc-asset.easyar.com/develop/wechat/mega/media/occlusion03.mp4" style="width:480px; max-width:100%; height:auto;" muted playsinline controls></video>

> 有了遮擋後,這個熊貓就可以躲在牆後面跳舞了。
如何佈置複雜幾何體的遮擋
適用於異形設備、不規則建築等需要高精度遮擋的場景。
您可以利用 Block 的稠密模型裁剪並減面得到您需要用於遮擋的白模。
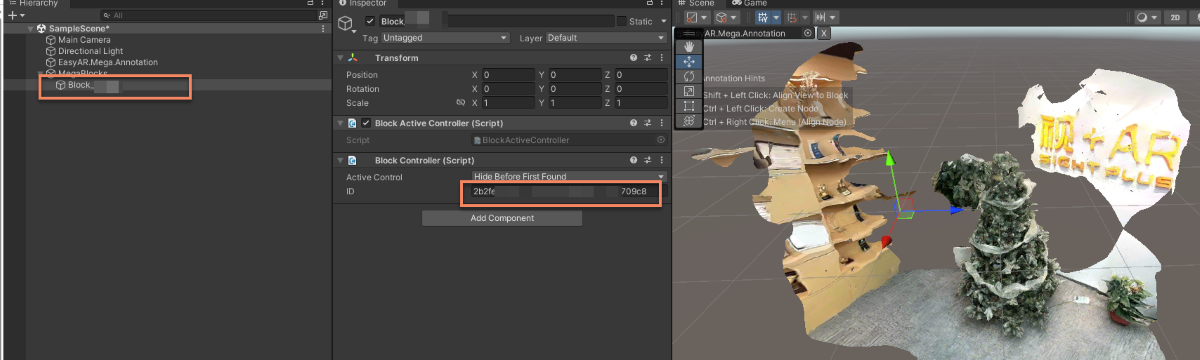
在 Unity 場景中點擊 Mega Block 節點,在 Inspector 面板中記錄 BlockID
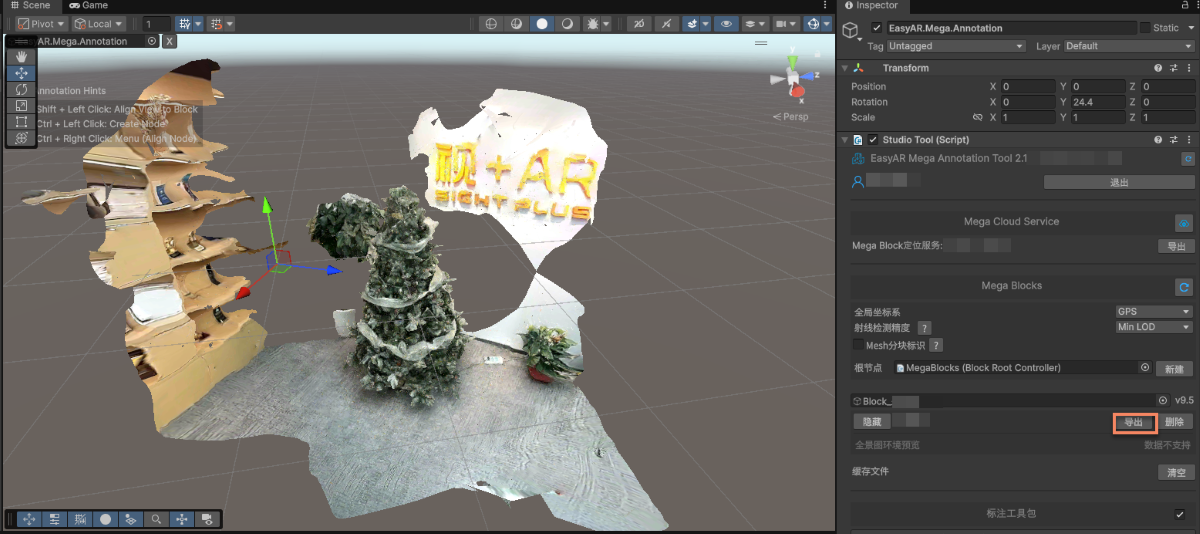
在 Mega Studio 的 Block 中選擇導出。
修改導出選項後導出。
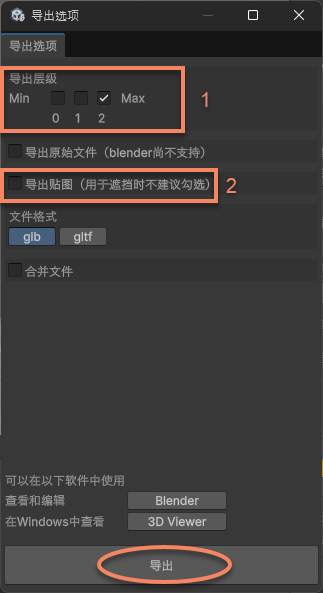
圖中 1 為 LOD 層級,層級越低模型越簡單,面數越少,若需要最高的精度選擇2,若能接受降低精度以減少面數選擇 1 或者 0。
圖中 2 為導出貼圖選項,由於我們只需要白模作為遮擋,不需要貼圖。
將導出後的模型在數字內容創建軟件(例如 Blender)中進行裁剪,減面,保存為
Glb。提示
例子中使用的是 Blender 的 Decimate Modifier
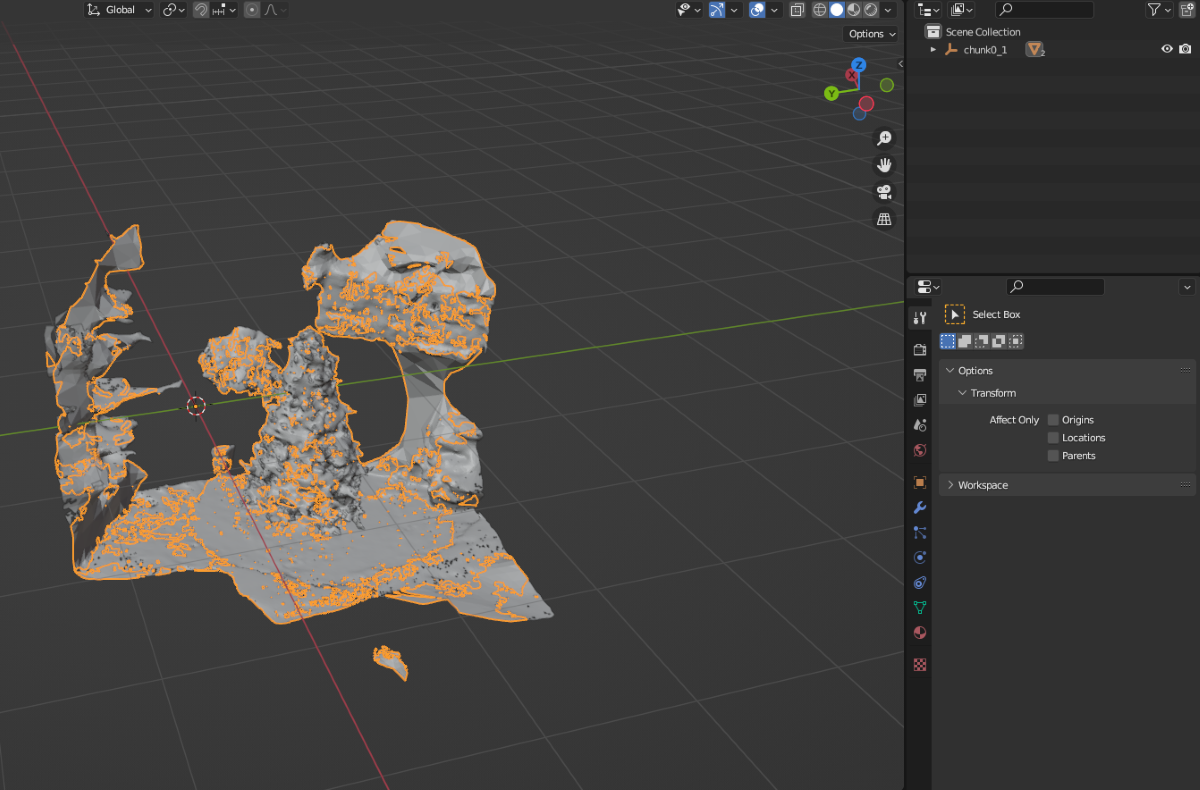
裁剪並減面後:

將遮擋用的
Glb文件掛載到文件服務器,得到一個用於加載的 url。在 xr-frame 小程序中加載作為遮擋的 GLTF。
首先加載遮擋用的 GLTF 模型,然後使用
scene.createElement(xrFrameSystem.XRGLTF,options)創建 GLTF 模型。使用
assets.getAsset("material", "easyar-occlusion")獲取材質對象使用
model.getComponent(xrFrameSystem.GLTF).meshes.forEach((m: any) => {m.setData({ neverCull: true, material: occlusionMaterial });}修改 GLTF 模型的材質。附註
easyar-occulusion材質的加載,註冊,反註冊,卸載由 AR Session 控制。
const sampleAssets = {
    occlusion1: {
        assetId: "occlusion1",
        type: "gltf",
        src: "url/occlusion1.glb",
        options: {}
    }
}
async loadAsset() {
    if (!scene) {console.error("Empty scene"); return;}
    try {
        await scene.assets.loadAsset(sampleAssets.occlusion1);
    } catch (err) {
        console.error(`Failed to load assets: ${err.message}`);
    }
},
addOcclusion() {
    model = scene.createElement(
        xrFrameSystem.XRGLTF,
        {
            "model": assetInfo.assetId,
            "anim-autoplay": assetInfo.animation ? assetInfo.animation : "",
            "scale": assetInfo.scale ? assetInfo.scale : "1 1 1",
            name: "tree"
        }
    );
    const blockID = "aaaa1234-bbbb-cccc-dddd-eeeeee123456" //此處應填寫 Block ID
    if (!blockHolder.getBlockById(blockParent.id)) {
        // 若沒有存在的 Block 節點,則創建一個
        blockHolder.holdBlock({
            id: blockID
        })
    }
    // 獲取 xr-frame 場景中的 Block 節點
    let blockElement = blockHolder.getBlockById(blockParent.id).el;
    // 將裁剪後的遮擋模型掛載到 Block 節點下,作爲其子節點
    blockElement.addChild(model);
    /**
     * 由於 GLTF 加載器的行爲不同,爲了保證模型在 xr-frame 上的朝向 與 Unity 的渲染結果完全一致
    * 有時需要對加載後的模型原地繞 Y 軸旋轉 180 度
    */
    let modelTransform = model.getComponent(xrFrameSystem.Transform);
    let currentRotation = modelTransform.quaternion.clone();
    let targetRotation = currentRotation.multiply(new xrFrameSystem.Quaternion().setValue(0, 1, 0, 0));
    modelTransform.quaternion.set(targetRotation);
    //注意必須在修改 Transform 後修改材質
    if (assetInfo.assetId == 'occlusion1') {
        //獲取 mega 插件提供的遮擋材質
        let occlusionMaterial = scene.assets.getAsset("material", "easyar-occlusion");
        //修改遮擋材質
        model.getComponent(xrFrameSystem.GLTF).meshes.forEach((m: any) => {
            m.setData({ neverCull: true, material: occlusionMaterial });
        });
    }
}
> [!NOTE]
> 這裡使用 Mega Block 稠密模型進行裁剪後作為遮擋不需要使用標注同步空間位置,這是因為在數字內容創建軟件(如 Blender) 中,可以在不改變坐標系定義的情況下對模型進行減免和裁剪。
>
> 若需要精確擺放自己製作的 GLTF 模型遮擋,請參考[如何擺放與空間對齊的遮擋模型](./sample.md#wechat-mega-sample-precise-occulusion-model)

最終實機運行效果見文章頂部視頻。
遮擋的效果預期
xr-frame 小程序上遮擋的效果主要由以下幾點影響:
- 定位跟踪本身的精度
- 模型擺放的準確程度
- 模型本身的精度(如果不是簡單的幾何體)
在定位漂移時出現數公分未對齊的情況是正常的。
遮擋用的模型面數太多容易影響性能,建議只在必要區域使用,並且盡量使用簡單的幾何體作為遮擋。