Создание задачи лазерного сбора (E57)
В этой статье описан полный рабочий процесс задачи лазерного сбора в формате E57, включая создание задачи, загрузку данных и процесс построения карты, чтобы помочь пользователям стандартизированно выполнить весь процесс лазерного сбора и картографирования E57.
Создание задачи лазерного сбора E57
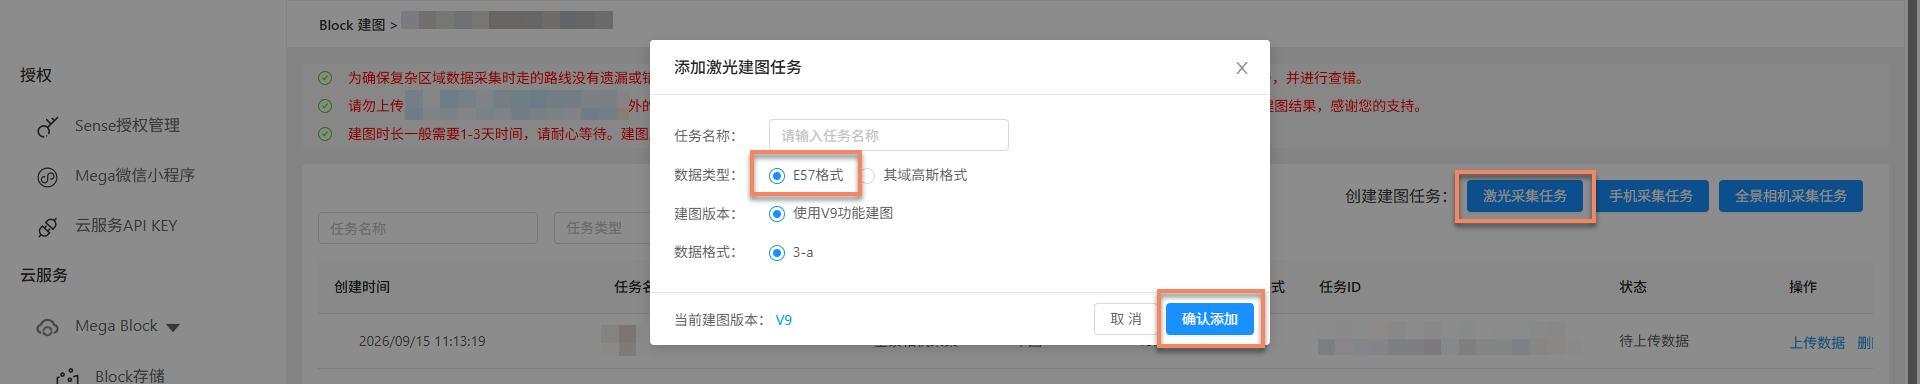
After creating a project, click Manage to enter the mapping task management page (skip this step for Mega Go). Click the Laser acquisition task button in the upper-right corner. In the pop-up dialog, enter Task name, select E57 format for Data type, use the latest version for Mapping version and Data format, and click Confirm add to create a Qiyu acquisition task.

Подготовка данных
Before starting a mapping task, make sure the acquired spatial data meets the requirements and is organized and stored according to the specifications. The following sections describe data acquisition and export in detail.
Сбор и экспорт данных
Use a laser scanner to acquire spatial data. For related device configuration and acquisition points, see:
Загрузка данных
Нажмите Загрузить данные и выберите соответствующие параметры во всплывающем окне. Подробности по каждому параметру приведены ниже:
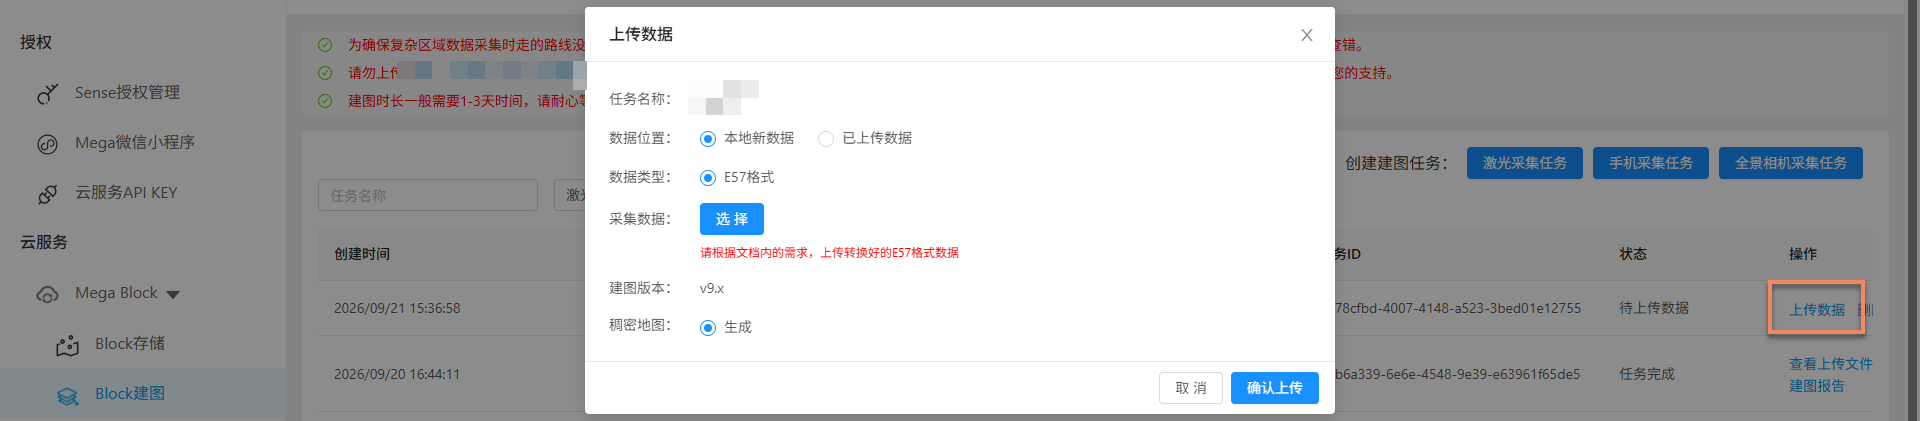
Расположение данных
The available upload methods vary depending on the region where the mapping project is located:
China Region 1
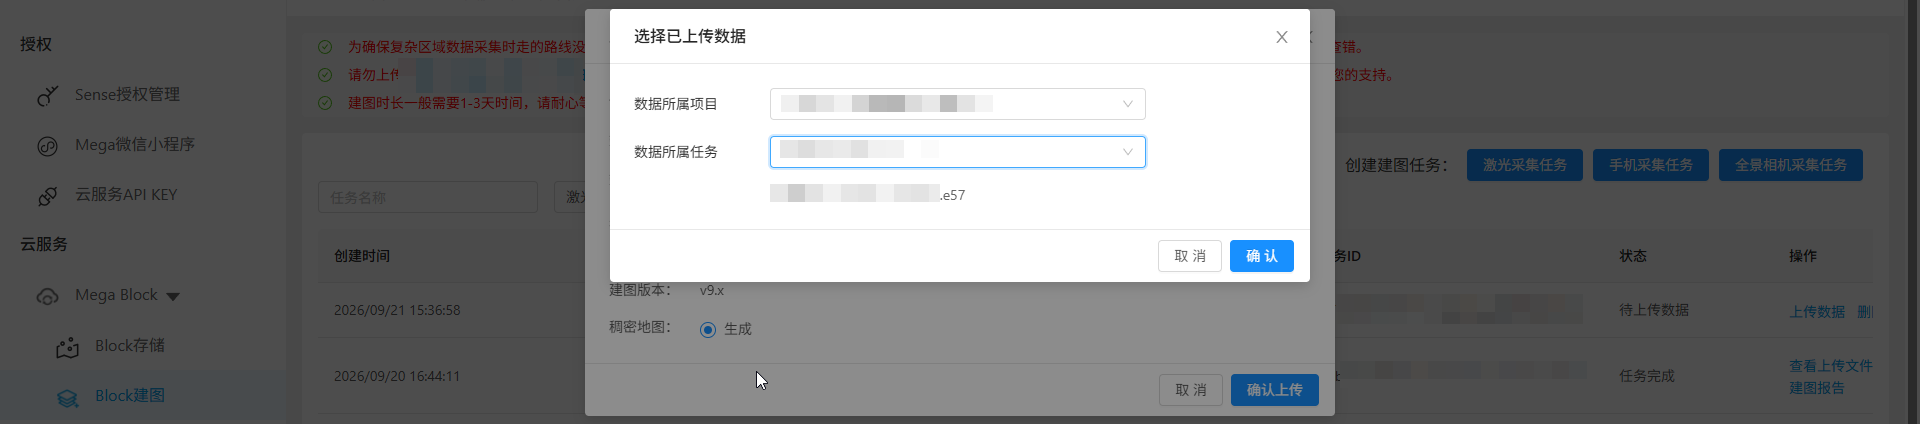
Depending on the data source and storage method, you can choose either of the following methods:
- Local new data
- Uploaded data (not supported by Mega Go)
Global
Only Local new data is supported.
Данные сбора
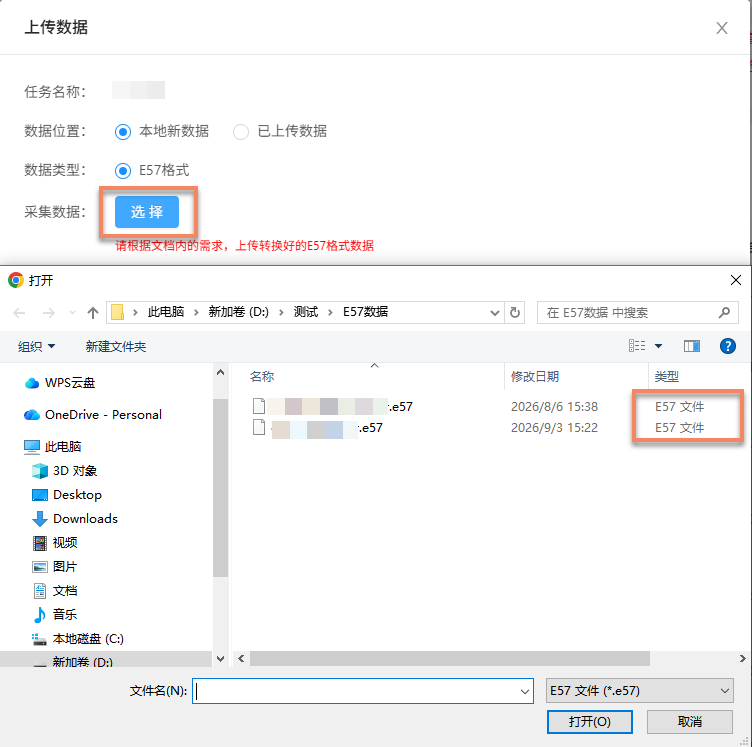
Upload a file with the .e57 suffix. Click Select, choose the specified file in the directory, and click Open.
Подтверждение загрузки
- After clicking
Confirm upload, the list displays the upload progress and status. - During data upload, keep the computer powered on and the network connected. Do not close the browser, refresh the page, or click other menus; otherwise the upload will be interrupted and must be performed again.
Начало построения карты
After data upload is complete, the mapping process starts automatically. The status is displayed as Queued or Generating, as shown below. Wait patiently for mapping to complete.

Вспомогательные функции
The following functions help you manage and operate mapping tasks more efficiently:
Просмотр загруженных файлов
Click View uploaded files to view all uploaded files in the dialog and confirm that all files have been uploaded, avoiding mapping failures caused by missing files.

Остановка построения карты
Before the mapping task is complete, if you find that the wrong data was uploaded or the trajectory data does not match the actual situation, click Stop mapping, then click Confirm in the second confirmation dialog to stop mapping.

Удаление задачи
If the current mapping task failed or is no longer needed, click Delete task to delete it. Click Delete in the second confirmation dialog to complete the deletion.

Подтверждение результатов построения карты
After the task enters the mapping process, you can determine whether the mapping task is complete from Task status. When the status is Task complete or Generation failed, the mapping task has ended.
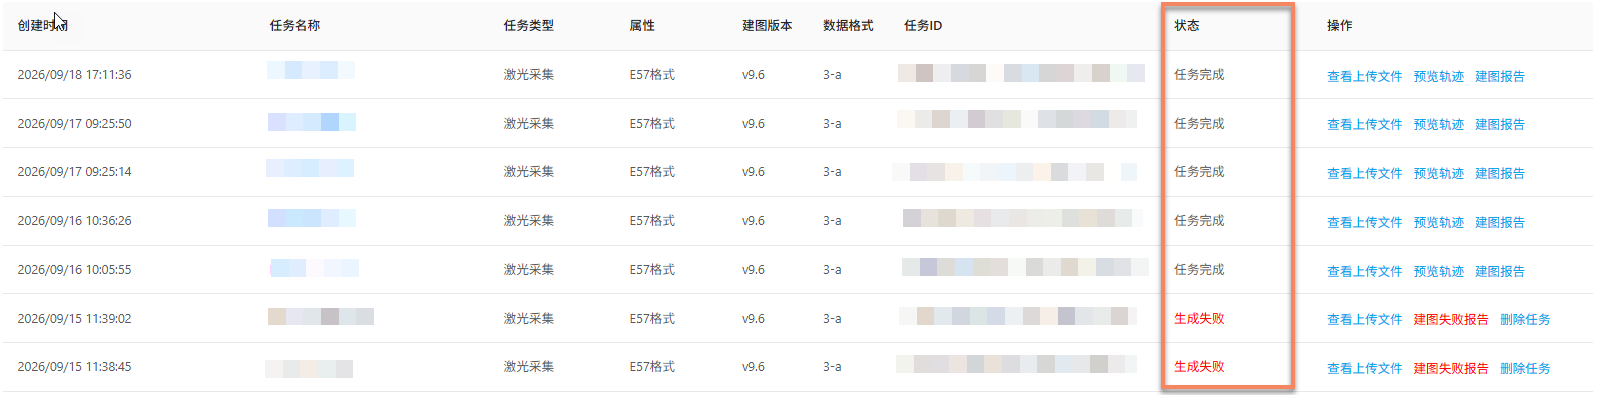
Построение карты успешно
When the task status is Task complete, mapping succeeded and the mapping result has been generated. You can further inspect the result and confirm whether it meets expectations.
View mapping results:
- Review acquisition route (not supported by Mega Go)
- View mapping report
- View Block information (not supported by Mega Go)
- Preview spatial model
Построение карты не удалось
When the task status is Generation failed, mapping failed. Troubleshoot the problem as follows:
- View mapping report: View mapping report and find a solution based on the report information.
- Refer to troubleshooting: Read the mapping failure troubleshooting guide for common solutions.
- Contact technical support: If the methods above do not solve the problem, contact EasyAR staff and provide the
JobIDfrom the mapping report for fast diagnosis.